This tutorial is also applicable to BPI-M1, BPI-M1+, BPI-M2+, BPI-M2S, BPI-M2 Pro, BPI-M2M, BPI-M2U, BPI-M2 Burry, BPI-M2 Zero, BPI-P2 Zero, BPI -M3, BPI-M64, BPI-CM4, BPI-R2, BPI-R64, BPI-R1, BPI-R3 Min.
1、get ready:M5 board, SD card, card reader, 5V adapter, usb to ttl cable( or HDMI cable and monitor, mouse, keyboard).
SD Formatter (Download link: https://download.banana-pi.dev/d/ca025d76afd448aabc63/files/?spm=wolai.workspace.0.0.6b9c394bQaPoSe&p=/Tools/image_download_tools/SD%20Formatter.zip)
BalenEtcher (Download link: https://github.com/balena-io/etcher/releases/download/v1.18.11/balenaEtcher-Setup-1.18.11.exe)
MobaXterm (Download link: https://mobaxterm.mobatek.net/download-home-edition.html?spm=wolai.workspace.0.0.6b9c394bQaPoSe)
2、Format SD card.
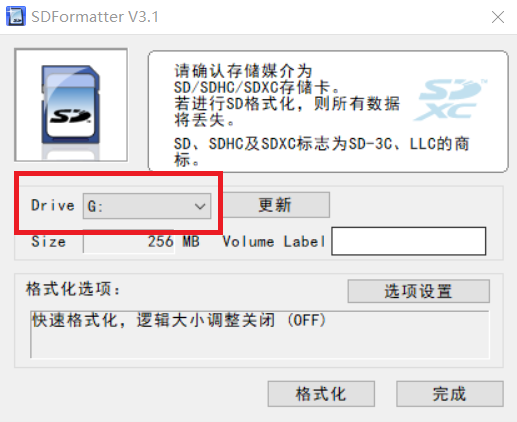
Insert the SD card into the card reader, and then insert into the computer. Open the SD Formatter. Select the disk that needs to be formatted in the Drive option.
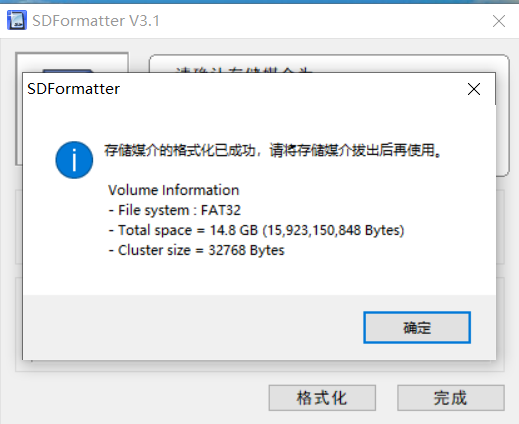
Click Format. After completion, as shown in the figure below.
3、Image
You can download the image on the websites below.
Banana Pi Open Source Project (banana-pi.dev)
Banana Pi Wiki (banana-pi.org)
4、Record
The image name I use is Armbian_23.5.1_Bananapim5_bookworm_current_6.1.30_xfce_desktop.img.
Open BalenaEtcher, click Flash from file, and select the image that needs to be recorded.
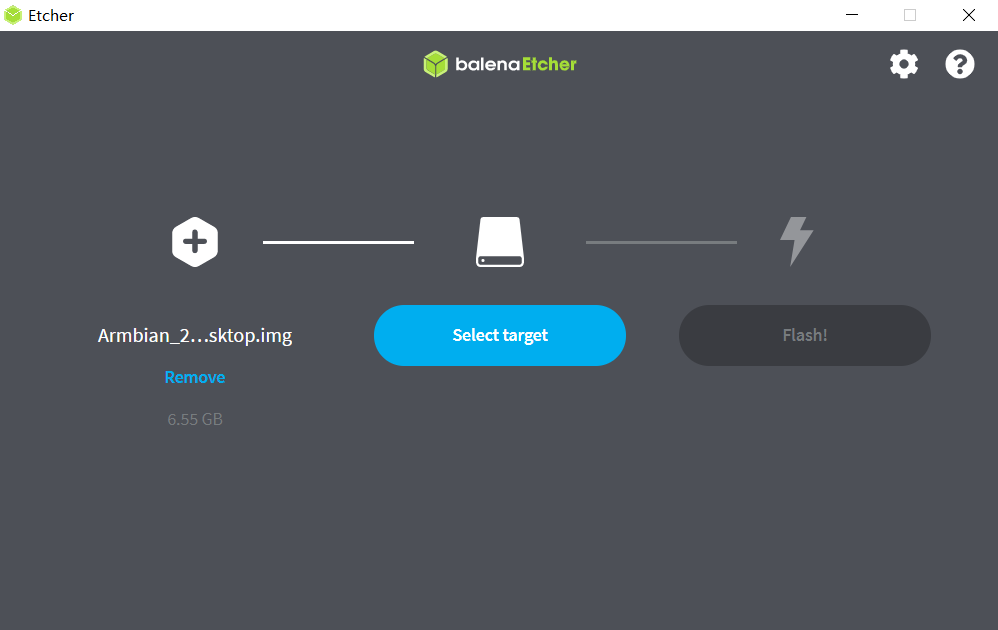
Click Select target,choose the right sd card.
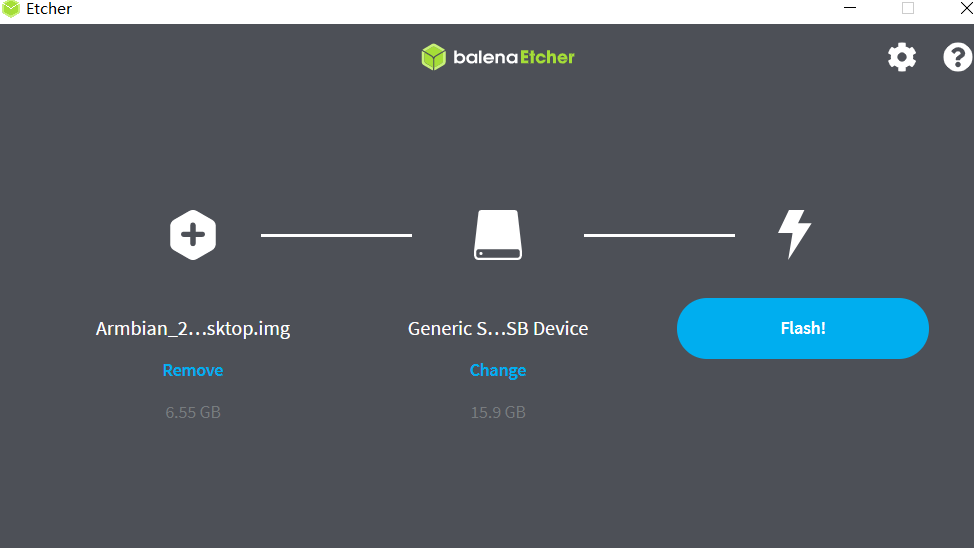
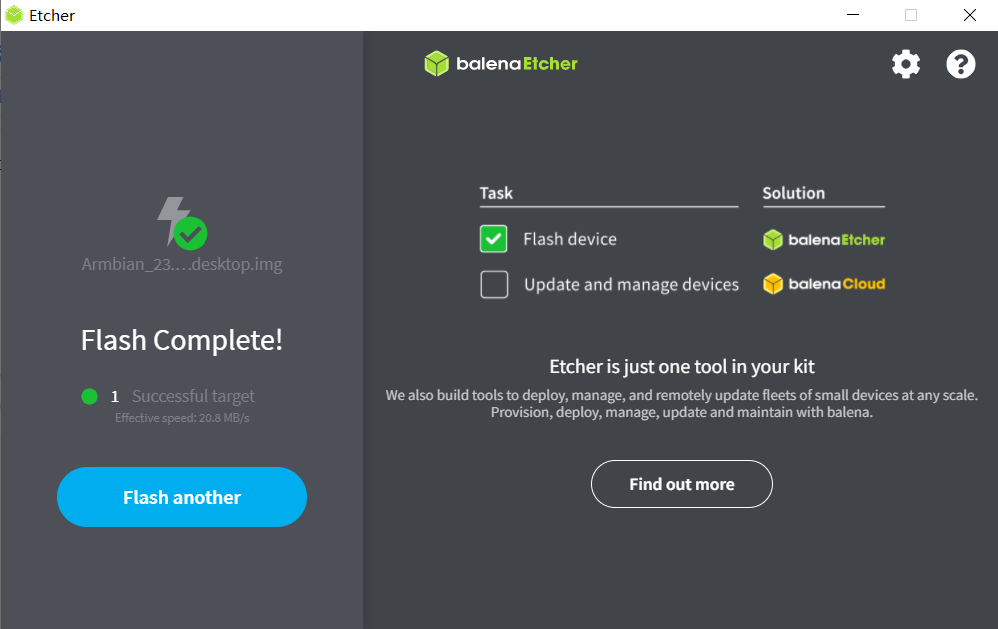
Click Flash.
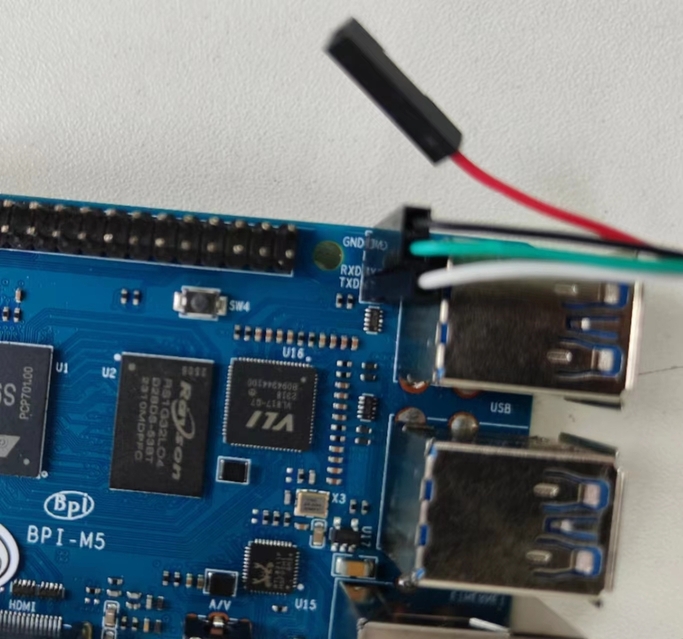
5、usb to ttl cable
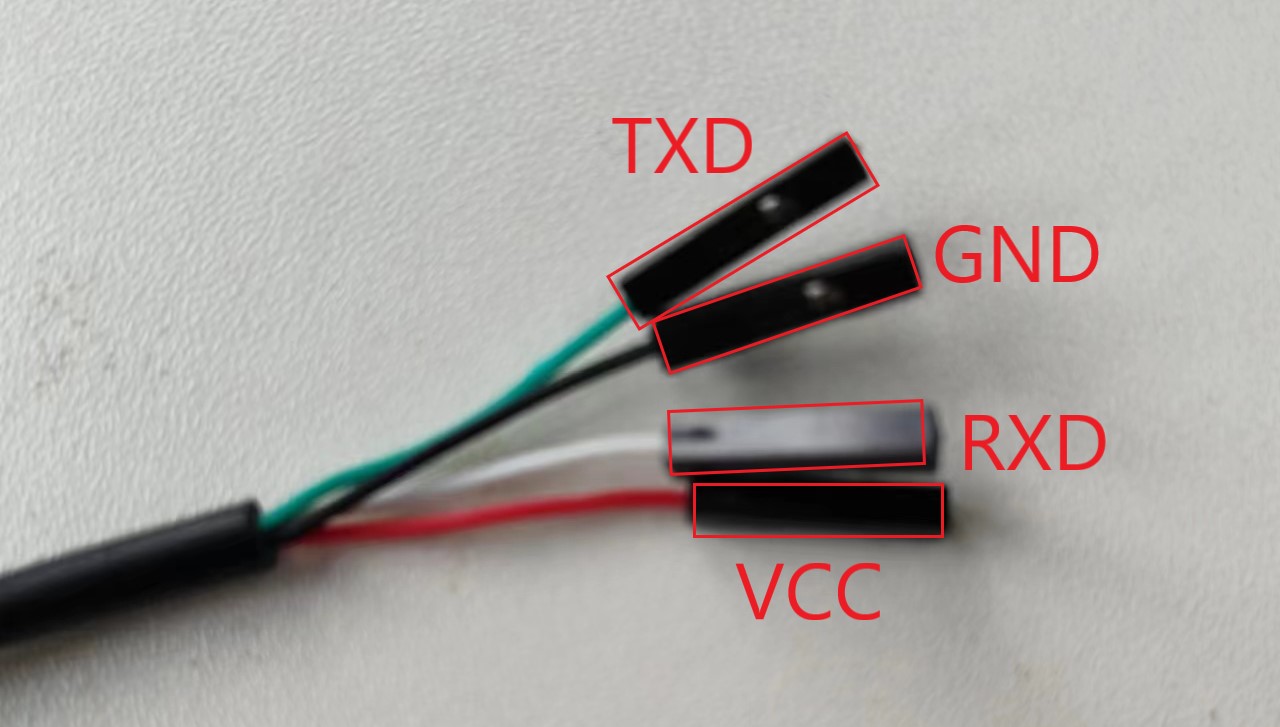
Insert it correctly into the board (TXD and RXD are connected in reverse, VCC does not need to be connected)
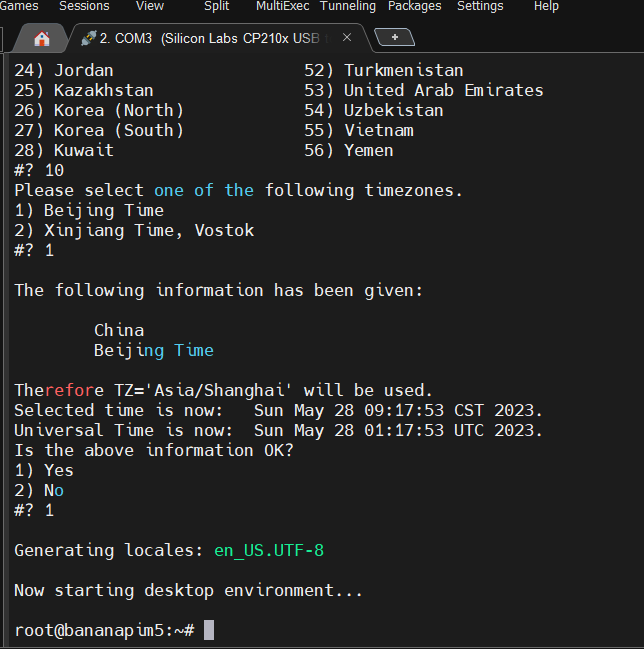
6、start up
Note:The EMMC of the M5 needs to be empty,if you have images on EMMC it will boot from EMMC by default.
Insert the SD card into M5 and insert USB to TTL Cable (or Monitor).
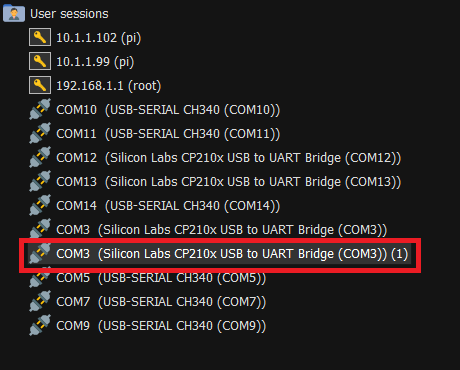
Open Mobaxterm, click Session.

choose Serial

Select the corresponding port in the Serial Port, and select Speed 115200.

Select Port
Plug in 5V power to start M5 from the SD card.
If there is no preset account, it needs to be created according to the guide. If there is a preset account, it is pi/bananapi or root/bananapi.