share by gaara:
I have worked few days to put my Android system on an SSD (Sandisk 64GB), and I share here my method, because it’s really faster to run with it.
Prerequisite:
- Knowing to build an Android image, with all working drivers. See the mattrix post. I’m using Kubuntu 14.10 x64 to do it, but 14.04 is better (with make version 3.8)
- Knowing to burn the image with Phoenix Card (100% works with win7 x64)
- Install cfdisk and dd on your Ubuntu system
- A usb - sata adapter to plug the sata drive on Ubuntu
- A SD card reader on Ubuntu system
The steps:
- Modify the source to redirect system to load from the SATA drive
- Compilation
- Burnig the SD card
- Cloning the card on the SATA drive
- Create a new partition in the drive
- Format the new partition
- Plug all (SD and SATA drive) on the Banana/Orange Pi)
- START !
All is good ? So let’s go !
Details:
- There’s just one file to modify /ANDROID/android/device/softwinner/sugar-lemaker/init.sun7i.rc
At the begining of this file, there are some lines which are here to mount the differents partitions. We are going to modify it:
a) on early-init
-
Comment mkdir /mnt/sata 0000 system system → #mkdir /mnt/sata 0000 system system
#mkdir /mnt/sata 0000 system system The others line on this block are the same. b) on early-fs
-
Change /dev/block/system to /dev/block/sda7
mount ext4 /dev/block/sda7 /system wait noatime nodev barrier=0
C on fs
-
Add a block to mount /sdcard, it will be in the future partition (the largest partition)
on fs
try to mount /sdcard
wait /dev/block/sda4 mount vfat /dev/block/sda4 /mnt/sdcard defaults
Modify the # try to mount /data block: Replace all the /dev/block/data by /dev/block/sda8 (5 x)
# try to mount /data
    wait /dev/block/sda8
    mount ext4 /dev/block/sda8 /data wait noatime nosuid nodev barrier=1
    setupfs /dev/block/sda8
    umount /data
    exec /system/bin/logwrapper /system/bin/e2fsck -y /dev/block/sda8
    exec /system/bin/busybox mount -t ext4 -o
noatime,nosuid,nodev,barrier=1,journal_checksum,noauto_da_alloc /dev/block/sda8 /data Copy the Code- Optionnal: modify the # try to mount /cache: The cache is the swap of the system, if you have HDD no problem you can modify it. For a SSD it’s better to have the cache in the SD card, so don’t modify it. (but I’m a bad guy, I have done it, unless I have a SSD) Replace all the /dev/block/cache by /dev/block/sda10
# try to mount /cache
    mount ext4 /dev/block/sda10 /cache wait noatime nosuid nodev barrier=1
    setupfs /dev/block/sda10
    umount /cache
    exec /system/bin/logwrapper /system/bin/e2fsck -y /dev/block/sda10
    exec /system/bin/busybox mount -t ext4 -o
noatime,nosuid,nodev,barrier=1,journal_checksum,noauto_da_alloc /dev/block/sda10 /cache Copy the Code- # try to mount /private No need to modify it, this stay on the SD card.
-
Modify the # try to format /databk: Replace all the /dev/block/databk by /dev/block/sda13
try to format /databk
 wait /dev/block/sda13
 mount ext4 /dev/block/sda13 /databk wait noatime nosuid nodev barrier=1
 setupfs /dev/block/sda13
 umount /databk
 rmdir /databk
The end of this file is the same! Save and quit your text editor. Note: this file contains also all the insmod, the drivers you can load at the startup. But it’s another thing, it should be done before this.
-
Compile the Android image (all the details are in the Mattrix post)
-
Burn it with Phoenix Card
-
Cloning the SD card into the SSD/HDD: I’m using Ubuntu to do it. First, you must know where are the SD card and your SATA drive. For this I’m using Gparted but others solutions can be used. For me, SD is /dev/sdc and SSD is /dev/sdd So X an Y must be yours. The command to clone is:
sudo dd if=/dev/sdX of=/dev/sdY bs=4M
Be carreful with dd, it’s a dangerous command with your Ubuntu system if you go wrong. It take about 5 min to copy all the SD card.
-
Create a new partition in the SATA disk (/dev/sda4 in Android, but /dev/sdY4 in Ubuntu) a) I’m using cfdisk to do it.
sudo cfdisk /dev/sdY
Copy the CodeYou should see 12 partitions in there (even if /dev/sdY13 exist). In fact, /dev/sdY4 don’t exist, we will create it.
Navigate at the end of the partitions, there’s free space.
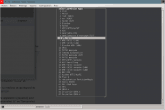
 With the menu, select this:
-
New
-
type the size you want (It should be possible to create 2 or 3 partitions if you want*)
-
Type → navigate up and select W95 FAT32 (first page, the menu is big)

-
Write → confirm with typing “yes”
-
Quit
b) We need to format the new partition in Fat32:
sudo mkfs -t vfat /dev/sdY4 (it can be sdb4 or sdc4, be careful)
Now, all is done ! You can remove the SD card and the drive from your Ubuntu system, and plug it on your Banana/Orange Pi.
Turn on your board and enjoy the new speed !!!
You can verify your storage, mine is 51.26GB
