Done, it think.
Done, it think.
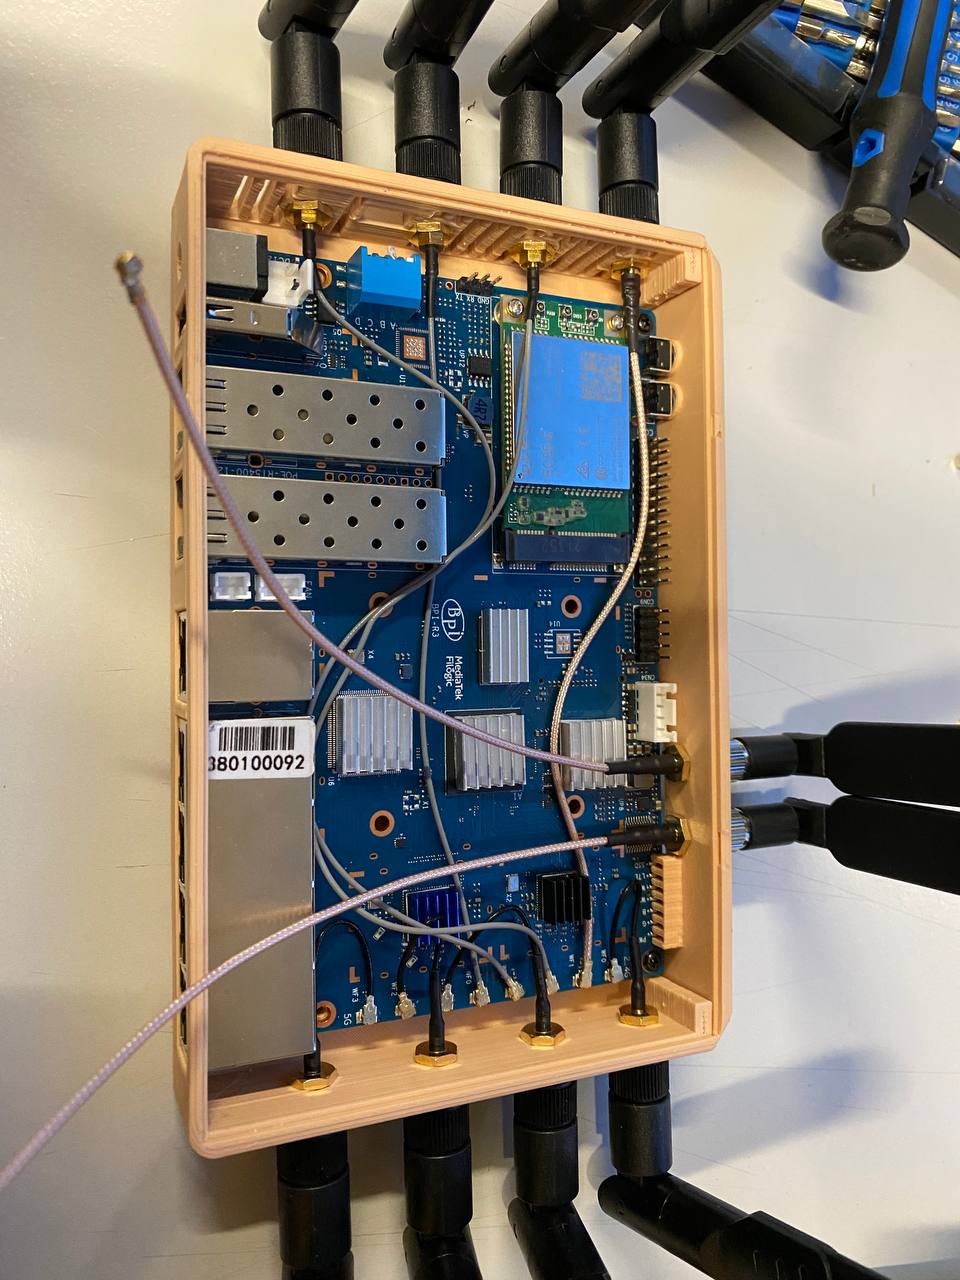
Nice. How is top cover mounted? I do not see any sockets for screws.
As a side-note: we got both wifi-leds working now: https://patchwork.kernel.org/project/linux-wireless/list/?series=702661
Backport to 6.1 in my 6.1-r3 tree
I love it  can’t wait to try it

Finished I guess. I am going to publish it to printables so that everyone can download it.
This is the readme that will be included:
The case has four parts:
To fully assemble the case you will need some self tapping screws to secure the mainboard in place and also to secure fix the rear cover to the main case.
You may also want to add 6mm rubber feet to the case.
There are two versions of the main case, one with a rear NVME access and one without.
For the NVME version, an extra NVME cover is provided
There are two versions of the top cover, one with 40mm fan mount and holes and one without.
There are two versions of the rear cover. One with two holes for the 4G antennas and one without the two holes for the antennas.
All the parts print well with 0.1, 0.2 and 0.3 layer height.
I was able to print the main case without supports, but if your printer struggles with bridges you may want to use “tree” like supports for the main case. the other parts don’t need support.
Because of the heat generated by the device is is advisable to print using heat resistant plastic.
It will be online today on a friend’s account. as soon as it is I will put the link here
That’s really amazing news!
The case is fixed into place with two screws
Thank you for sharing the 3D Print <3
thanks It prints and fits very well 
thank you for the 3d model files. i wonder why you don’t have ventilation holes on the right side…
no particular reason really! 
ok, will you add them? btw. whats the height of the case above board? is it possible to connect gpio/debug-uart/usb and close the top cover?
It’s 12mm from the top of the board to the bottom of the top cover. It’s possible to plug all stuff and close the cover.
I don’t like too much holes in cases and I don’t think the case needs more ventilation but I would be glad to make a version for you that has them if you want.
usb-connector is like standard-dupont 14mm+cable going out from top (needs at least 16mm height)
for gpio i found a angled 2x13 which is 13mm high, for debug-uart i found a 1x3 connector with long pins which i can bend to an 90° angle (then ~9mm heigh)

maybe it’s possible to design top-cover which lets a bit more space to the top (20mm to not bend cables too much)? imho your first version was not that flat.
afair it looks better if right side has ventilation holes too 
Great stuff, thank you so much!
There’s also a 2xUSB2.0 header (2x5 pins next to 2x13) worth to be noted. USB 2.0 sockets may be put “2nd floor” above the rest of stuff.
Also extensive cooling system may require some more space (btw - does this thing really need an extensive cooling?)
I would say that absence of ventilation holes on the right side, together with active cooling fan on the top cover, would allow to cool down the radiator on 4G card (if present) much better than if the holes on the right side woulld be present… it’s just a thought though 
With fan maybe,but for my last tests, fan is not required for normal usage,so i suggest air ventilation holes on both sides. If do not want them you can close them with duct tape from inside of case or remove them before printing case.
Finas told me he will design higher case to allow plugging debug-uart and gpio. And yes,for usb2 header i do not know any angled connectors and the one i have are 16mm in height.
sorry guys, been out of town again. will do a taller version this week. will also make a version with ventilation on both sides.
Added case that is 8mm taller ( from top of board to top cover is 20mm. made all the variations possible, like with double vent with and without nvme slot.
I haven’t test printed the taller versions. please report and I will then upload it to printables.
That is an amazing piece of craftsmanship! I am trying to clarify whenever it is possible to operate two fans on one header. Guess it only depends on the power amps. If possible I had planned to reach out to someone with a water jet or laser cutter to make some cut outs on the metal case.
However your nice work seems much more feasible, though. I have never done some 3D modelling but will give it a try. Anyhow, I wanted to ask:
In addition to the ventilation honeycomb holes in the side panels, which are really appealing, why not using this style element instead of slits on the left and right sides …maybe for structural strength?
Which fans did you chose? I thought of using two Noctua NF-A4x10 5V PWM with a shallow depth of just 10 mm. One cooling the chips, the other the Mini PCIe but with the purpose of pushing more air over the chips with copper heat sinks with fins.
Any 3D-Print service you would recommend (I live in Germany) or would you actually consider to offer that yourself?
Edit: Copper Heatsinks with fins like these
https://de.aliexpress.com/item/4000107291369.html
Best Mike