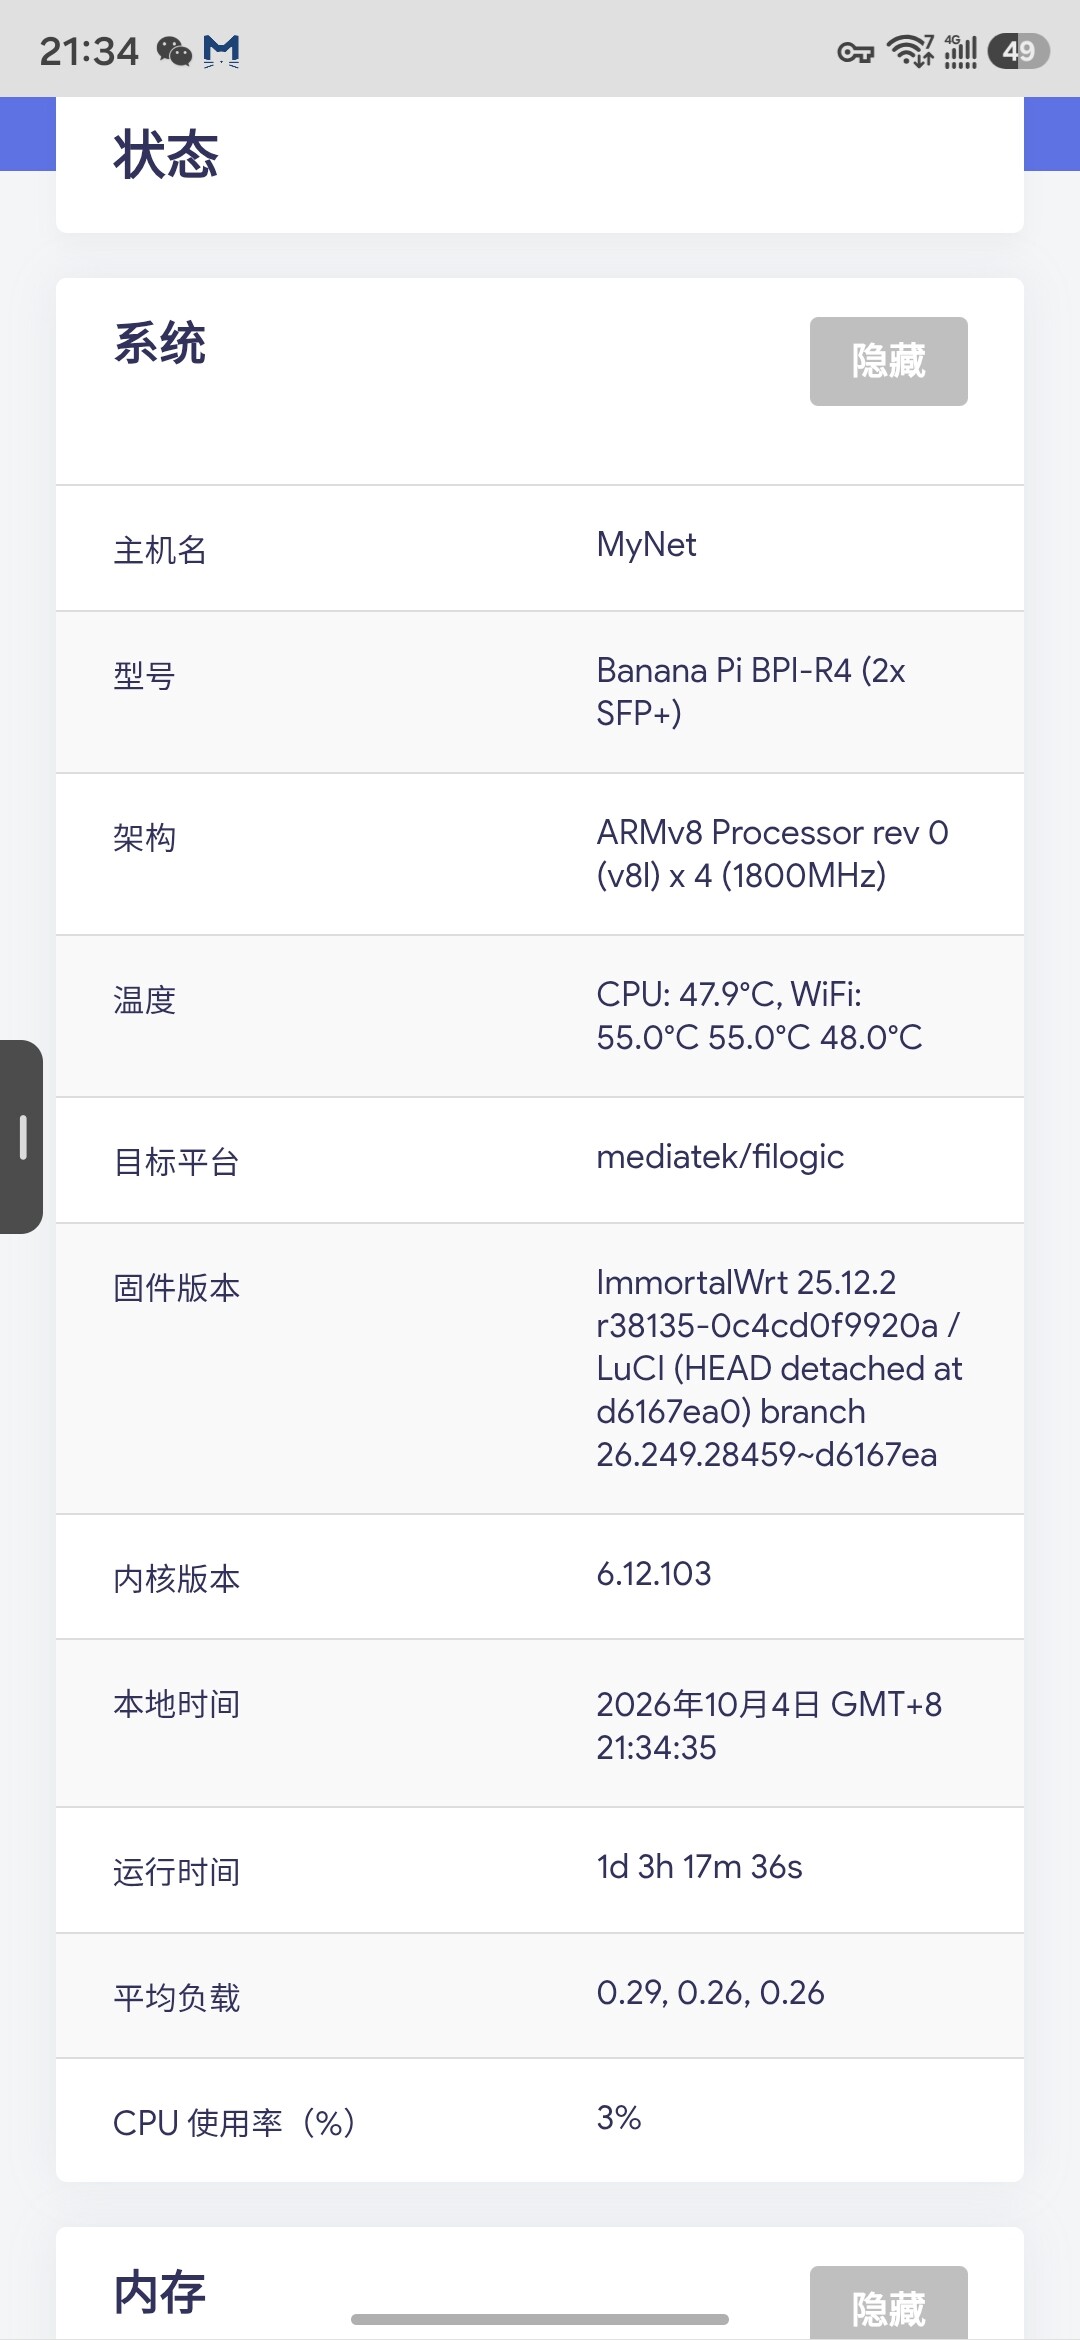
发帖说明:英文论坛正文,英文内容放前面,中文翻译紧跟在每一大段后面;代码块只放一份(Shell脚本不分语言) 重要声明反复强调:Only for ImmortalWrt 25.12.2, NOT for other firmware,避免海外用户乱刷其它固件出问题。 Introduction
English: The MT7996 WiFi7 module on Banana Pi BPI‑R4 is one of the main heat sources. Under heavy WiFi traffic, chip temperature rises rapidly. The official stock case has very limited internal space, making it hard to add active cooling.
After about 3 days of iterative testing and tuning (with assistance from ChatGPT), I built this complete solution. Instead of reading CPU temperature, the script reads real‑time MT7996/MT76 WiFi chip temperature. Combined with internal‑case fan mod, we achieve near‑silent operation while keeping WiFi temperature under control.
中文: 香蕉派 BPI‑R4 的 MT7996 WiFi7模块是整机主要发热源,高负载WiFi业务下芯片温升非常明显。原厂外壳内部空间局促,很难直接加装主动散热。 经过约3天反复调试(ChatGPT辅助完成脚本打磨),我完成了这套完整方案。脚本直接读取MT7996/MT76无线芯片温度,并非CPU温度。配合壳内魔改风扇安装,实现近乎静音的同时压制WiFi模组温度。
Hardware Requirement 硬件准备
English:
- BPI‑R4 board with case (Keep ~1cm gap between case inner wall and WiFi module; case must have sufficient ventilation holes)
- 4‑pin PWM controllable fan
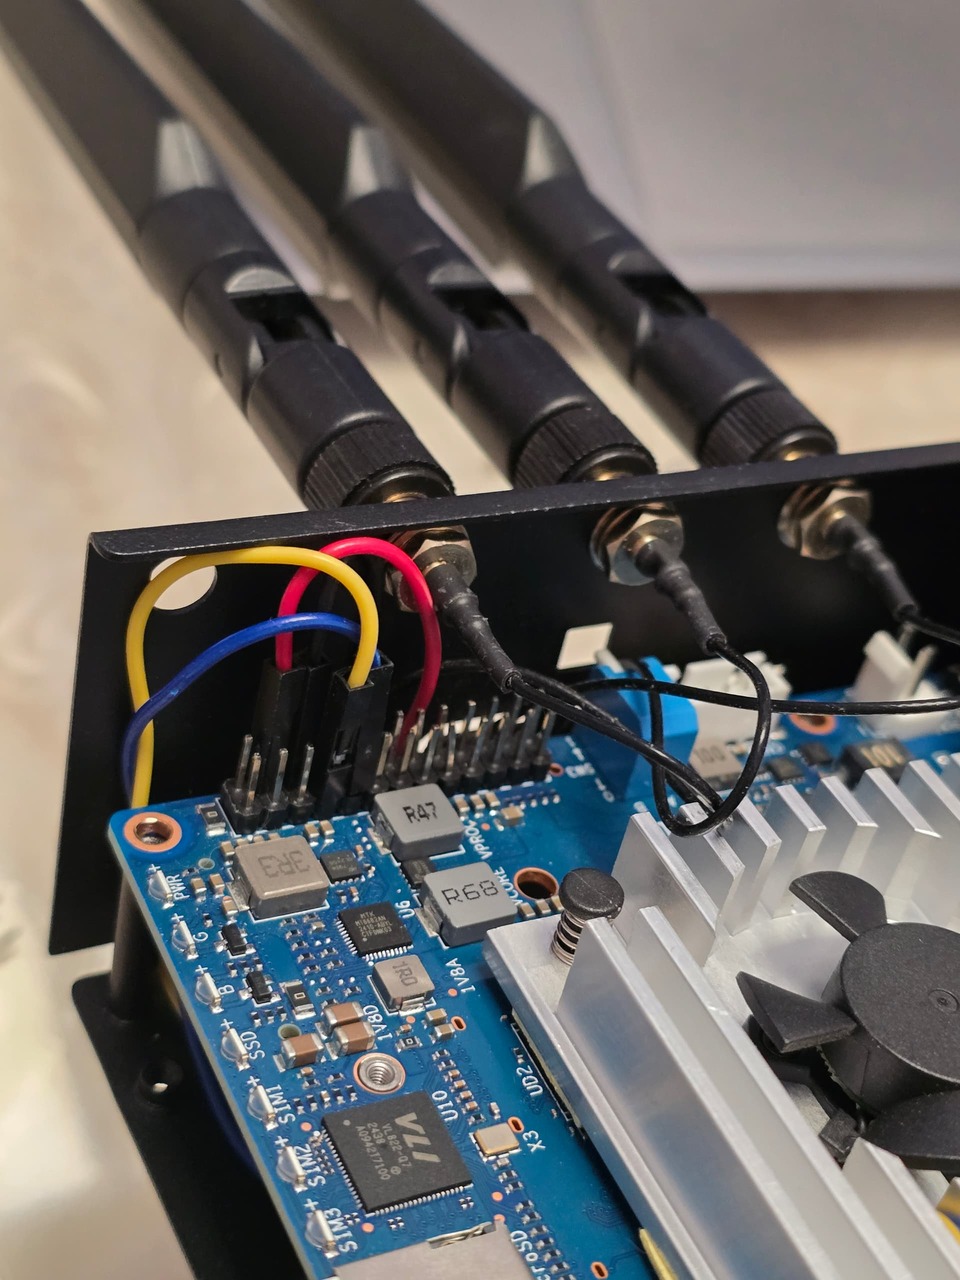
- 4 Dupont jumper wires for connecting fan to BPI‑R4 PWM6 pin
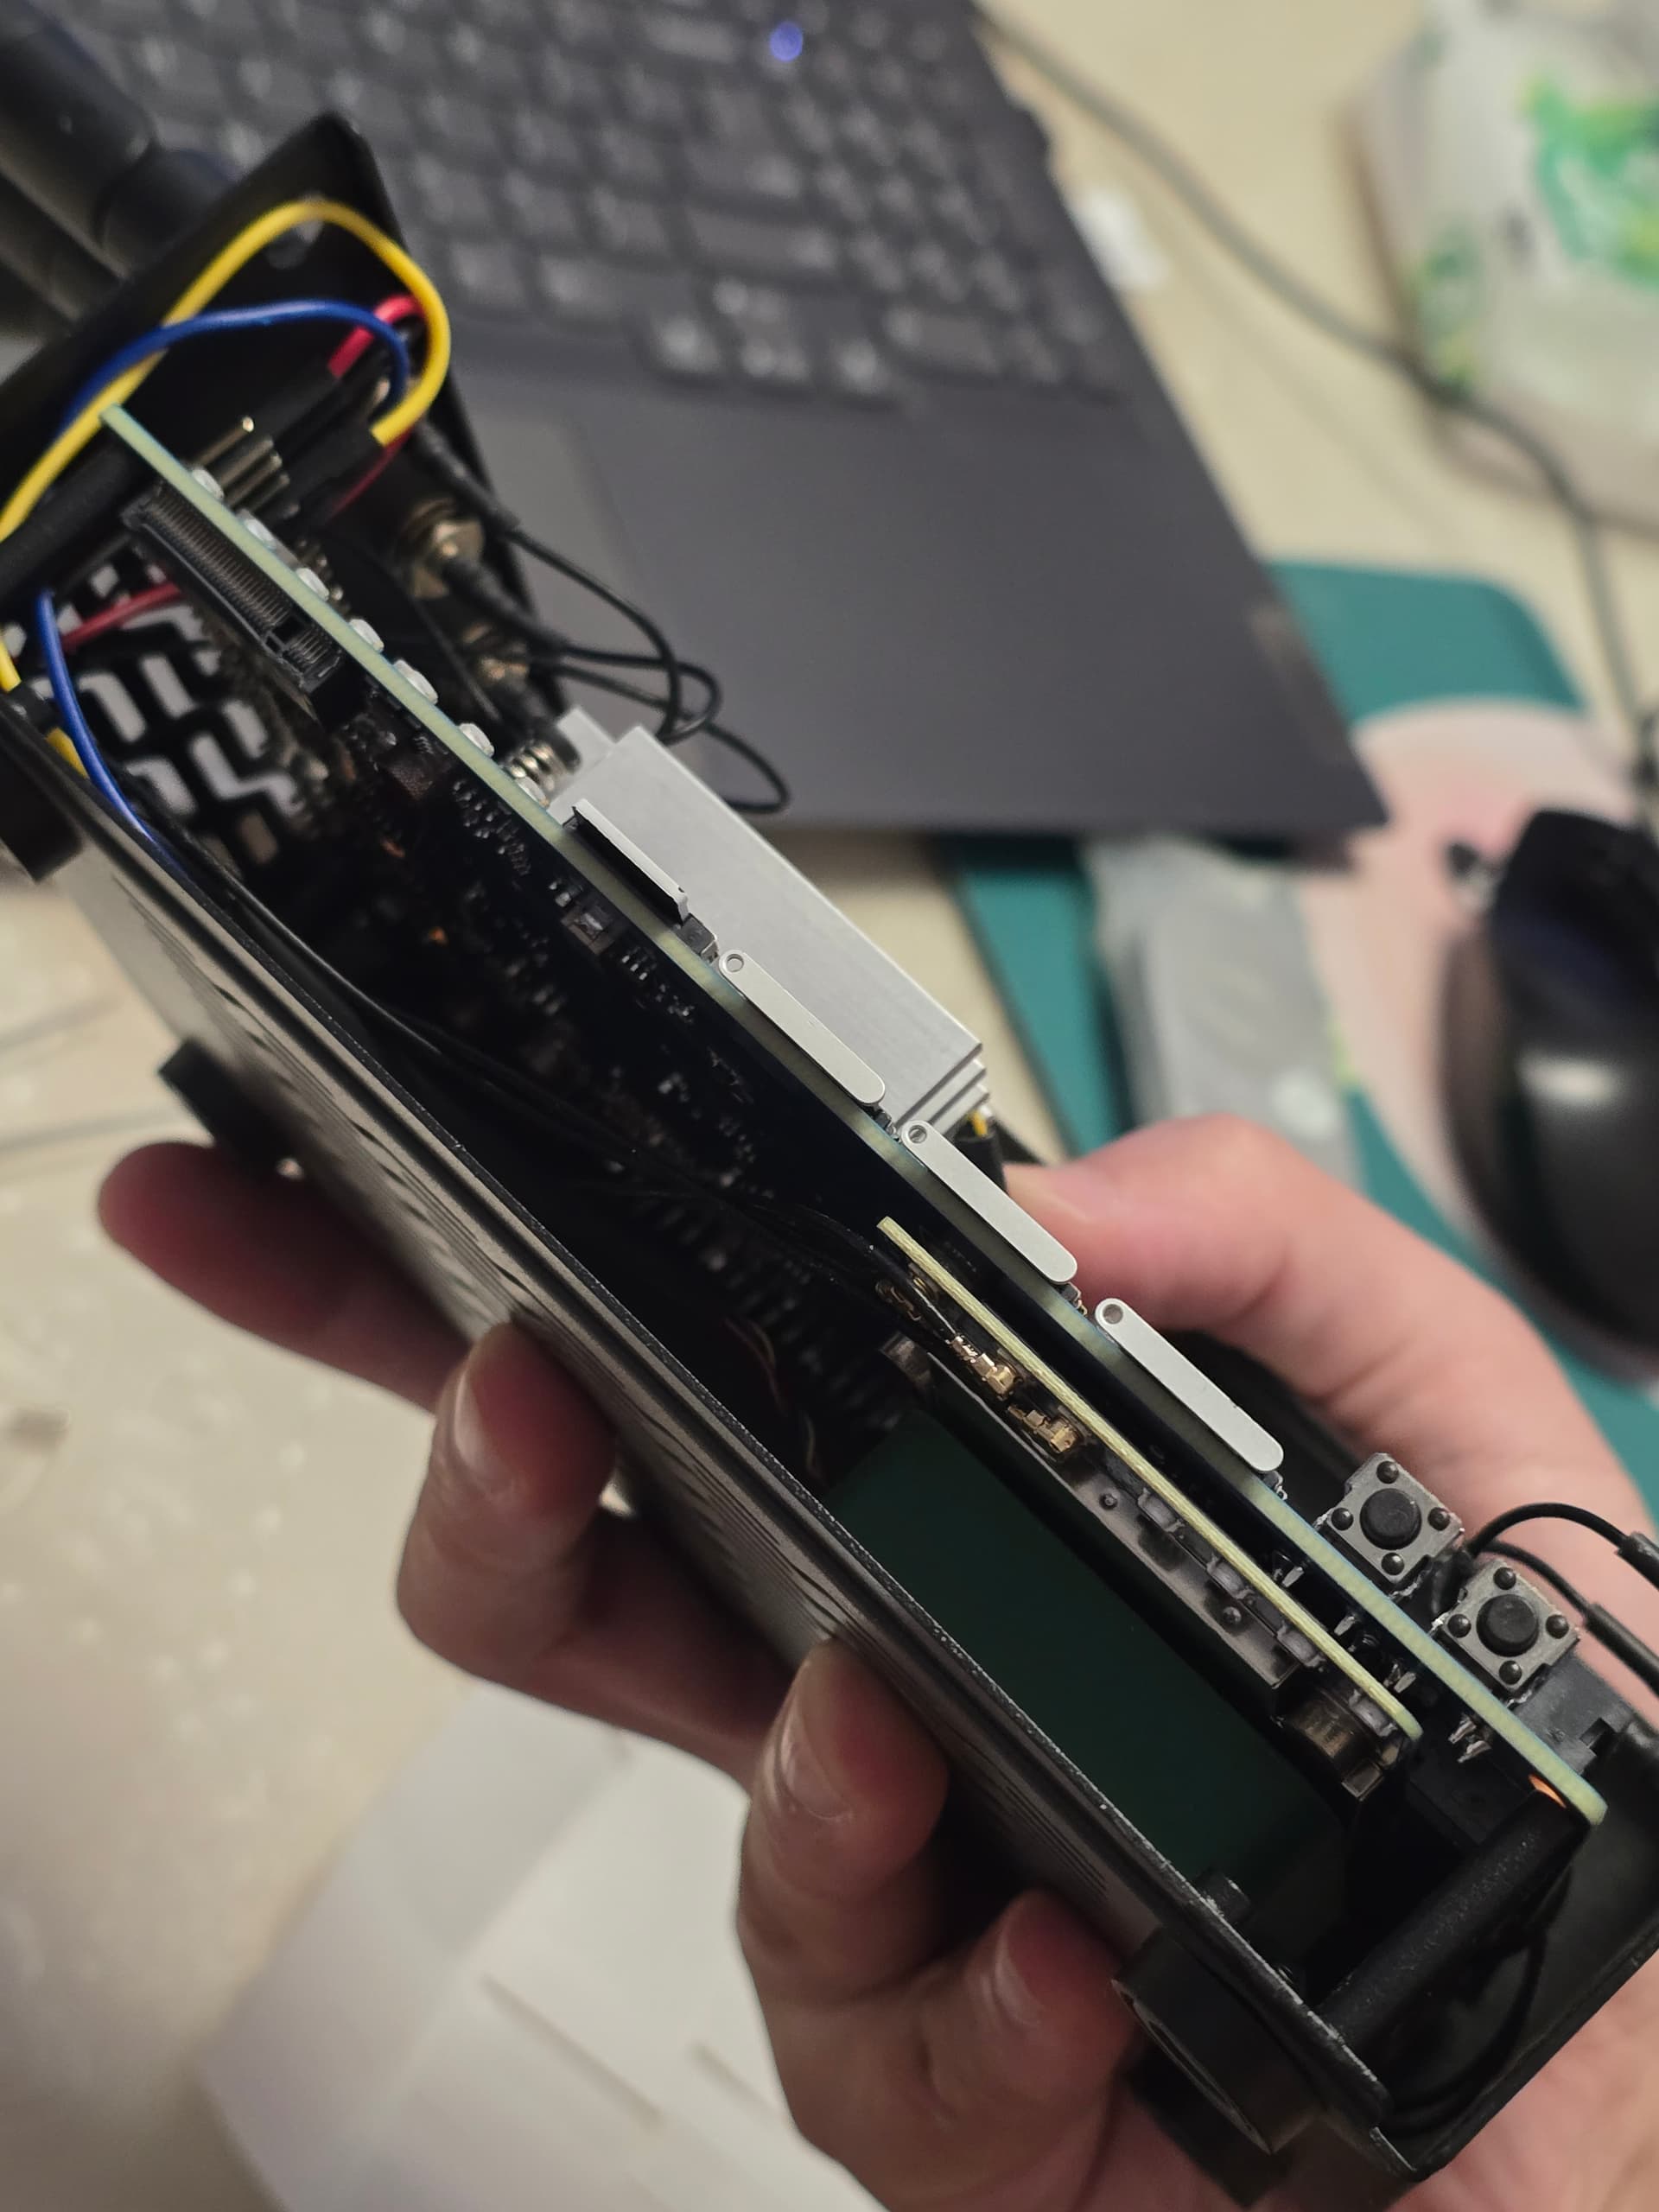
- Sponge double‑sided foam tape: ~1‑2 mm thickness, used to mount fan above WiFi module, dampen vibration and eliminate case resonance noise.
Installation note: Fan is installed INSIDE the enclosure, stick close above WiFi module. Sponge foam works as shock absorber. Heat exchange relies on original case ventilation holes, not external bare‑blowing.
中文:
- BPI‑R4开发板及外壳(外壳内壁与WiFi模块预留约1cm间隙,外壳需要有充足散热开孔)
- 4Pin PWM调速风扇
- 4根杜邦线,用于将风扇连接至BPI‑R4 PWM6引脚
- 海绵双面泡棉胶:厚度约1‑2mm,把风扇固定在WiFi模块上方,缓冲减震,消除壳体共振噪音。
安装要点:风扇安装在外壳壳体内部,贴近WiFi模块上方;泡棉起减震作用;依靠外壳自带开孔完成热交换,并非裸机向外吹风。
Real‑world Performance 实际效果
English:
- Light‑load: Fan keeps 30%‑33% duty cycle. Audible wind noise only when ear is very close to case; almost inaudible in daily usage.
- WiFi chip idle‑normal load temperature: 55‑58 ℃
- Control logic: Sample temperature every 10 seconds, maximum ±1% duty‑cycle change per cycle to avoid annoying fan speed hunting / rapid spin fluctuation.
- Managed by procd service: auto‑start on boot, auto‑restart on script crash, disable redundant log output to reduce flash wear.
Note: Minimum duty cycle is locked at 30%, fan will NOT stop completely. This is a trade‑off for silent performance of this specific fan model.
中文:
- 轻负载状态:风扇维持30%‑33%占空比,只有耳朵紧贴外壳时可以听到风声,日常环境几乎听不到噪音。
- WiFi芯片普通负载温度:55‑58 ℃
- 控制逻辑:每10秒采集一次温度,单次循环占空比最多±1%,杜绝风扇转速来回跳变的嗡鸣问题。
- procd系统服务托管:开机自启,脚本异常自动重启,关闭冗余日志输出,减少闪存损耗。
注意:脚本最低占空比锁定30%,风扇不会完全停转;这是针对该款风扇静音特性做出的取舍。
English:
 IMPORTANT: This script ONLY works on ImmortalWrt 25.12.2. Kernel pinctrl/PWM paths may change in other firmware versions, do NOT copy‑paste blindly.
The script will automatically generate fan control binary and register procd service. Check terminal output, PWM6: OK means initialization success.
IMPORTANT: This script ONLY works on ImmortalWrt 25.12.2. Kernel pinctrl/PWM paths may change in other firmware versions, do NOT copy‑paste blindly.
The script will automatically generate fan control binary and register procd service. Check terminal output, PWM6: OK means initialization success.
中文:
重要提醒:该脚本仅适用于 ImmortalWrt 25.12.2。其他固件内核pinctrl/PWM路径可能发生变化,请勿直接照搬使用。
脚本会自动生成风扇控制程序并注册procd开机服务。查看终端输出,出现 PWM6: OK 即代表初始化成功。
BPI R4 wifi 杜邦线风扇配置.txt (8.3 KB)