NOTE: SEE NEXT POST BELOW. THERE IS A MUCH BETTER SETUP.
Target Use Case:
You want to mitigate bufferbloat by capping upload speed to just below the ISP’s limit, but for whatever reason, you need to limit CPU utilization.
Standard solutions like SQM (Smart Queue Management) add too much CPU overhead, and standard Firewall4 (fw4 / nftables) rules get completely bypassed (for already-established connections) if Software or Hardware Flow Offloading is enabled.
But there is a way to mitigate bufferbloat, while using hardware and/or software offloading, while minimizing CPU utilization.
The Solution:
This method hooks directly into the network interface queue using Linux Traffic Control (tc) via a Token Bucket Filter (tbf) script. Because it configures the physical card’s egress queue, it works cooperatively alongside Hardware / Software Flow Offloading, keeps CPU usage near 0%, and perfectly caps upload speed to just below the ISP’s limit.
Step-by-Step Implementation:
Configure the Custom Startup Script
Create /etc/firewall.user:
touch /etc/firewall.user
Write the /etc/firewall.user script which defines the Traffic Control queue on the WAN interface (replace eth0 with your actual WAN interface name if it differs). You can choose between fq_codel and cake. fq_codel worked better for me.
FOR FQ_CODEL:
cat << 'EOF' > /etc/firewall.user
# 1. Clear any legacy queue configurations
tc qdisc del dev eth0 root 2>/dev/null

# 2. Add an HTB (Hierarchical Token Bucket) shaper capped at 33Mbit
# Explicitly setting quantum to 1500 prevents kernel scheduler warnings on lower speeds
tc qdisc add dev eth0 root handle 1: htb default 11
tc class add dev eth0 parent 1: classid 1:11 htb rate 33mbit ceil 33mbit quantum 3000

# 3. Attach FQ-CoDel directly inside that class to destroy upload bufferbloat
tc qdisc add dev eth0 parent 1:11 handle 11: fq_codel
EOF
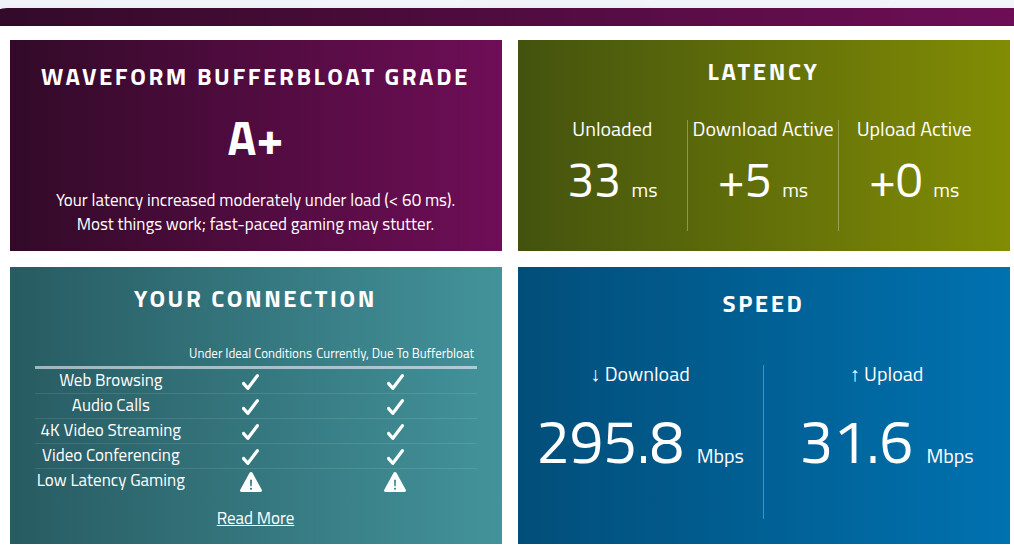
You should keep the quantum at a multiple of 1500 (ie: 1500, 3000, 4500, 6000, etc.), unless you’ve set your MTU to a different size (in which case, use the multiple of your MTU size). As you increase the quantum, your jitter will increase. When it reaches a point where you no longer have an A+ Bufferbloat grade, back off a bit.
Remember, if you’re experimenting, after everything is set up, all you should have to do is make changes to the /etc/firewall.user script above (make your changes, then copy the entire script from cat to EOF into a terminal, then press Enter), then you have to restart the firewall each time you make changes, via:
/etc/init.d/firewall restart
FOR CAKE:
cat << 'EOF' > /etc/firewall.user
# 1. Clear any legacy queue configurations safely
tc qdisc del dev eth0 root 2>/dev/null

# 2. Apply Cake directly with exact Docsis framing overhead rules
# 'triple-isolate' ensures per-host fairness to protect gaming/VoIP devices
# 'docsis' handles the packet framing overhead calculations automatically
# 'wash' safely cleans up incoming diffserv marks
tc qdisc add dev eth0 root cake bandwidth 33mbit docsis triple-isolate wash
EOF
If you want to use cake, you’ll have to install two packages:
apk update
apk add kmod-sched-cake tc-full
We only target upload speed, because on fast connections, download is not often saturated. But when upload speed is saturated, that affects downloads, so we want the slower upload speed to be as stable as possible.
Setting the raw rate slightly higher (~10% higher) than your target rate yields a true payload throughput at your target rate after accounting for Ethernet, IP, and TCP header encapsulation overhead.
Register the Script in Firewall4 (fw4):
To ensure the script runs automatically every time the firewall reloads or the router reboots, register it as a script-type include block in /etc/config/firewall:
uci add firewall include
uci set firewall.@include[-1].name='Bufferbloat mitigation (USER SET)'
uci set firewall.@include[-1].type='script'
uci set firewall.@include[-1].path='/etc/firewall.user'
uci set firewall.@include[-1].fw4_compatible='1'
Save changes and restart the firewall:
uci commit firewall
/etc/init.d/firewall restart
Add:
/etc/firewall.user
… to the list at System >> Backup / Flash Firmware >> Configuration, to be sure it survives a firmware update.
And that is it.
--------------------
Monitoring dropped packets and stats:
Because this operates within the tc subsystem rather than netfilter, you monitor it directly from the network queue. You can check statistics and bufferbloat drops by running:
tc -s qdisc show dev eth0
To monitor your stats dynamically in real-time during an active speed test, use this terminal loop:
while true; do clear; tc -s qdisc show dev eth0; sleep 1; done
Hit Ctrl-C to exit the loop in the code above when you’re done testing.
To run the BufferBloat test: