you need a decent serial sofware, putty indeed works well on windows.
And just spam the left button during boot process. The menu does show up kinda fast.
let me try to summarize my steps for the next Person to try and install this… because it took me way too long…
- As written in the guide for the old builds, you need fo burn MicroSD card with bananapi_bpi-r3-sdcard.img.gz (with win32disk imager i.E)
- Plugging the MicroSD card and setting Boot jumpers to all High, boots from MicroSD and it works out of the box!
- Connect Serial Cable and use Putty to interupt boot (by pressing left in the right moment or any other button… preferably not enter as that selects first option right away…)
- In the boot menu select “8. Install bootloader, recovery and production to NAND.”
- Jumpers to High-Low-High_Low to boot from NAND.take out MicroSD card, type reboot into putty
- Now it boots from NAND and you get the Option “9. Install bootloader, recovery and production to eMMC.”
- Jumpers to Low-High-High-Low and you will boot from eMMC.
Sidenote1: Snapshot builds do NOT come with Luci preinstalled… you need to install it manually (just step1 is enough).
now you just need to increase storage and you’re done.
To get the “Mount Points” Menu you need to install block-mount package and reboot.
More info here: [BPI-R3] Change or add partion to /overlay
Edit: Proper way to increase Storage/root
- Reboot into Nand. install
parted resize.f2fs should be preinstalled.
- in Parted type
print free to see free space available
- type
resizepart 5 and end point 835
- reboot
- use
resize.f2fs /dev/mmcblk0p66
root@OpenWrt:/# resize.f2fs /dev/mmcblk0p66
Info: MKFS version
  "Linux version 5.15.80 (builder@buildhost) (aarch64-openwrt-linux-musl-gcc (OpenWrt GCC 11.3.0 r21380-5429411f73) 11.3.0, GNU ld (GNU Binutils) 2.37) #0 SMP Fri Dec 2 15:57:48 2022"
Info: FSCK version
  from "Linux version 5.15.80 (builder@buildhost) (aarch64-openwrt-linux-musl-gcc (OpenWrt GCC 11.3.0 r21380-5429411f73) 11.3.0, GNU ld (GNU Binutils) 2.37) #0 SMP Fri Dec 2 15:57:48 2022"
    to "Linux version 5.15.80 (builder@buildhost) (aarch64-openwrt-linux-musl-gcc (OpenWrt GCC 11.3.0 r21380-5429411f73) 11.3.0, GNU ld (GNU Binutils) 2.37) #0 SMP Fri Dec 2 15:57:48 2022"
Info: superblock features = 0 :
Info: superblock encrypt level = 0, salt = 00000000000000000000000000000000
Info: Segments per section = 1
Info: Sections per zone = 1
Info: total FS sectors = 191392 (93 MB)
Info: CKPT version = 351ed6bb
[f2fs_do_mount:3587] Mount unclean image to replay log first
root@OpenWrt:/#
- Getting the Error message
[f2fs_do_mount:3587] Mount unclean image to replay log first you need to simply mount /dev/mmcblk0p66 /mnt and umount /dev/mmcblk0p66
root@OpenWrt:/# mount /dev/mmcblk0p66 /mnt
root@OpenWrt:/# umount /dev/mmcblk0p66
root@OpenWrt:/# resize.f2fs /dev/mmcblk0p66
Info: MKFS version
  "Linux version 5.15.80 (builder@buildhost) (aarch64-openwrt-linux-musl-gcc (OpenWrt GCC 11.3.0 r21380-5429411f73) 11.3.0, GNU ld (GNU Binutils) 2.37) #0 SMP Fri Dec 2 15:57:48 2022"
Info: FSCK version
  from "Linux version 5.15.80 (builder@buildhost) (aarch64-openwrt-linux-musl-gcc (OpenWrt GCC 11.3.0 r21380-5429411f73) 11.3.0, GNU ld (GNU Binutils) 2.37) #0 SMP Fri Dec 2 15:57:48 2022"
    to "Linux version 5.15.80 (builder@buildhost) (aarch64-openwrt-linux-musl-gcc (OpenWrt GCC 11.3.0 r21380-5429411f73) 11.3.0, GNU ld (GNU Binutils) 2.37) #0 SMP Fri Dec 2 15:57:48 2022"
Info: superblock features = 0 :
Info: superblock encrypt level = 0, salt = 00000000000000000000000000000000
Info: Segments per section = 1
Info: Sections per zone = 1
Info: total FS sectors = 191392 (93 MB)
Info: CKPT version = 351ed6c6
Info: Duplicate valid checkpoint to mirror position 1024 -> 512
Info: Write valid nat_bits in checkpoint
[FIX] (move_one_curseg_info:2857)  --> Move curseg[0] 3 -> 4 after 1000

[FIX] (move_one_curseg_info:2857)  --> Move curseg[1] 5 -> 9 after 1000

[FIX] (move_one_curseg_info:2857)  --> Move curseg[2] 6 -> a after 1000

[FIX] (move_one_curseg_info:2857)  --> Move curseg[3] 0 -> b after 1000

[FIX] (move_one_curseg_info:2857)  --> Move curseg[4] 1 -> c after 1000

[FIX] (move_one_curseg_info:2857)  --> Move curseg[5] 2 -> d after 1000

Info: Write valid nat_bits in checkpoint
Try to do defragement: Done
[migrate_ssa: 270] Info: Done to migrate SSA blocks: sum_blkaddr = 0xe00 -> 0xe00
[migrate_nat: 387] Info: Done to migrate NAT blocks: nat_blkaddr = 0xa00 -> 0xa00
[migrate_sit: 445] Info: Done to restore new SIT blocks: 0x600
Info: Write valid nat_bits in checkpoint
[rebuild_checkpoint: 591] Info: Done to rebuild checkpoint blocks
[update_superblock: 701] Info: Done to update superblock

Done: 0.000000 secs
root@OpenWrt:/#
- Reboot into eMMC by bootjumper changes.
- Check if it worked type
df -h
root@OpenWrt:/# df -h
Filesystem Size Used Available Use% Mounted on
/dev/root 5.5M 5.5M 0 100% /rom
tmpfs 997.9M 68.0K 997.8M 0% /tmp
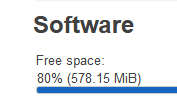
/dev/mmcblk0p66 719.8M 141.6M 578.1M 20% /overlay
overlayfs:/overlay 719.8M 141.6M 578.1M 20% /
tmpfs 512.0K 0 512.0K 0% /dev
root@OpenWrt:/#
and done!
P.S
If you have used up strage space from failed installations via opkg use this script ro remove them.
Edit2: Use the rest of the Storage!
opkg update
opkg install uvol autopart
uvol create userdata $(uvol free) rw
And you get a /tmp/run/uvol/userdata directory
if that doesn’t work you can do it manually.
use cfdisk to create a new partition as big as you want.
mkfs.f2fs /dev/mmcblk0p7
And mount in in the Mount manager of the web interface. done