Done! I hope this can be checked.
First of all, thank you for the many helpful comments which helped me with my decisions.
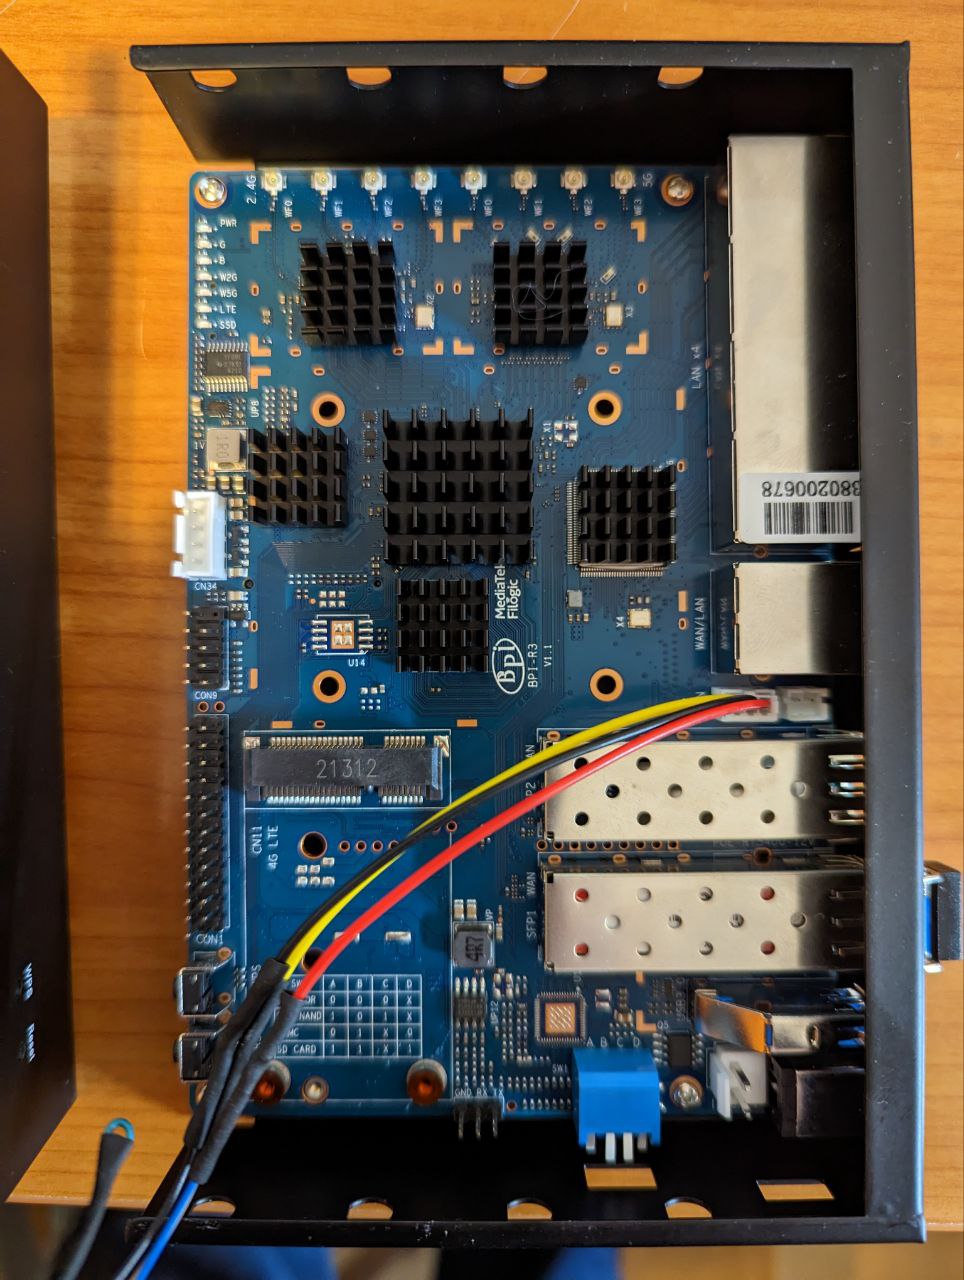
In my setup, I deactivated the wifi chip by unloading the mt7915e module, because I don’t need it. This dropped the heat development a bit. I only use the Banana Pi as a gateway for my 1GBit fiber optic connection for netflow traffic analysis.
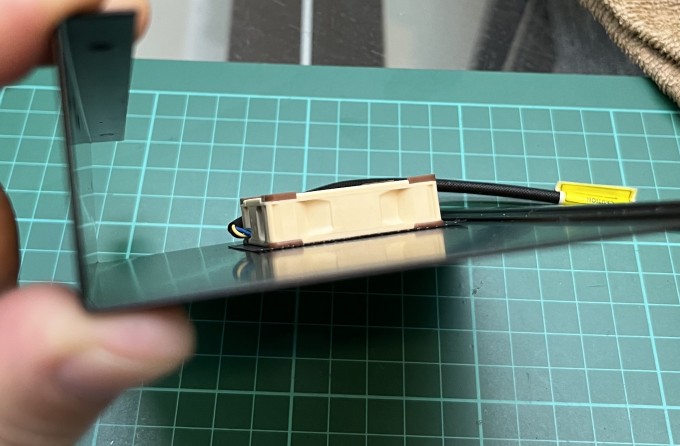
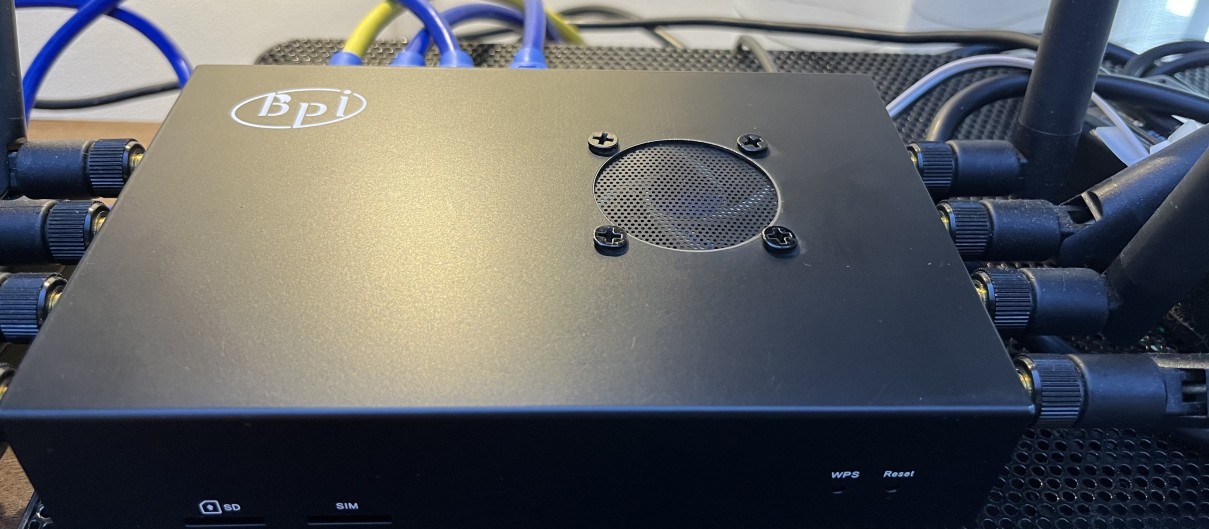
To do this, I glued individual heat sinks to each chip with thermally conductive adhesive. All packed in a metal case. Drilled a hole in the cover and inserted a 5V PWM fan.
This usually runs at the lowest inaudible speed and is controlled by pwm. The temperature of the CPU is 26°C in a performance/stress test and the SFP connector is 36°C.
here is my part list:
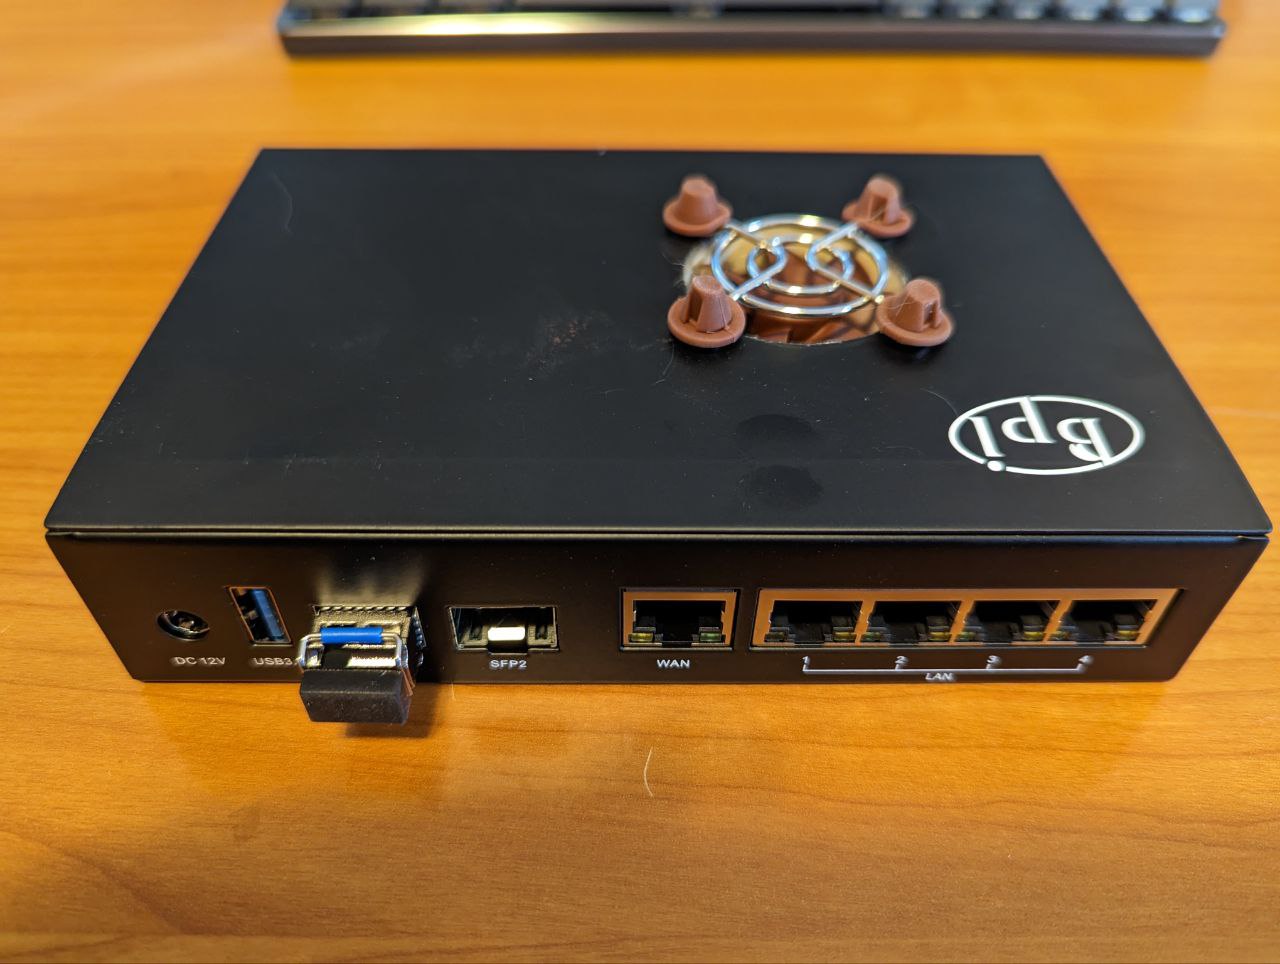
Metal case: https://de.aliexpress.com/item/1005004885309544.html
SFP Transceiver Modul: https://www.fs.com/de/products/20140.html
Heat Sink: https://amzn.to/3j1ojQy
Fan grille: https://amzn.to/3Xrec6R
Thermal adhesive: https://www.webshop-innovatek.de/waermeleitmittel/waermeleitkleber/701/high-silver-waermeleitkleber-2x-4-g?number=501909-01

4 Likes
What is the OS? I have also 5V Noctua with PWM and the fan runs for just 5 second during boot and stops after that. What is the reason about that? Thank you.
i guess your board does not reach the temperature where fan is activated 
to activate pwm, you have to call
echo 1 > /sys/class/thermal/cooling_device0/cur_state
and my OS is lates openwrt trunk… but it does not matter for pwm.
2 Likes
That’s the answer I was looking for. Thank you!
Possible hw improvement would be adding a switch like bootswitches in v1.0 for R317/R318 to select fan voltage without soldering.
@sinovoip is this possible?
I’ve only seen heatsinks with fan and 43mm hole pitch using a 12v fan…no 5v fan. Ordered 2 5v pwm fans and heatsinks without holes to drill holes and cut a thread.
I just ordered the Noctua. I’m contemplating to buy a northbridge heat sink and remove the fan to screw the Noctua on the heatsink, if it does not work I’ll do your setup.
If I do that, what is the diameter of the hole you pierced in the case for the fan, and what is the bit size for the drill for the screw holes?
I have a 40x40mm fan,drilled a 36mm hole for fan and 3mm for the screws
I did something similar. I have mounted a heatsink of about 60x70mm, drilled a 28mm hole on the case and put a 30mm 5v fan in it. The temperature is now about 33 degrees Celsius (with the room at 20 degrees). I have now ordered a second BPI-R3 and I think I will do something similar for the fan but will probably use small single chip heatsinks.
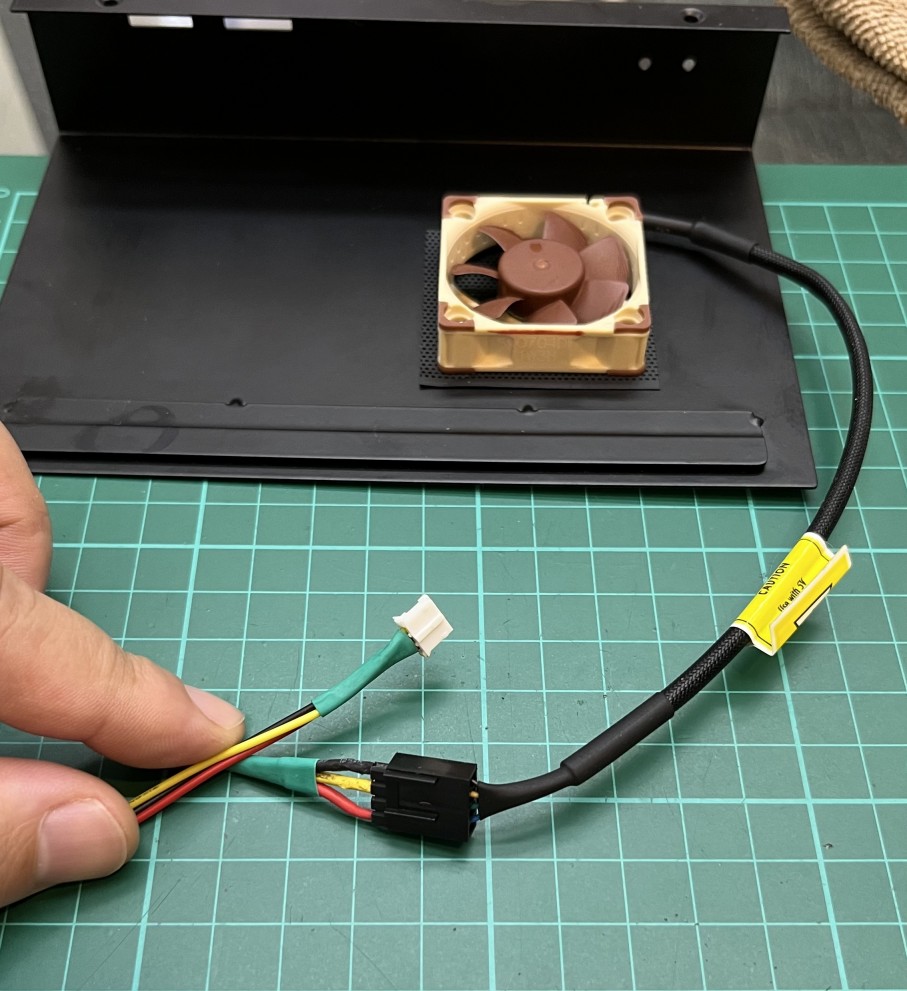
I just received the Noctua PWM. There are 4 wires on the fan, 3 on the board. I see that you selected one of the 2 blue wires. Does it matter which one you take?
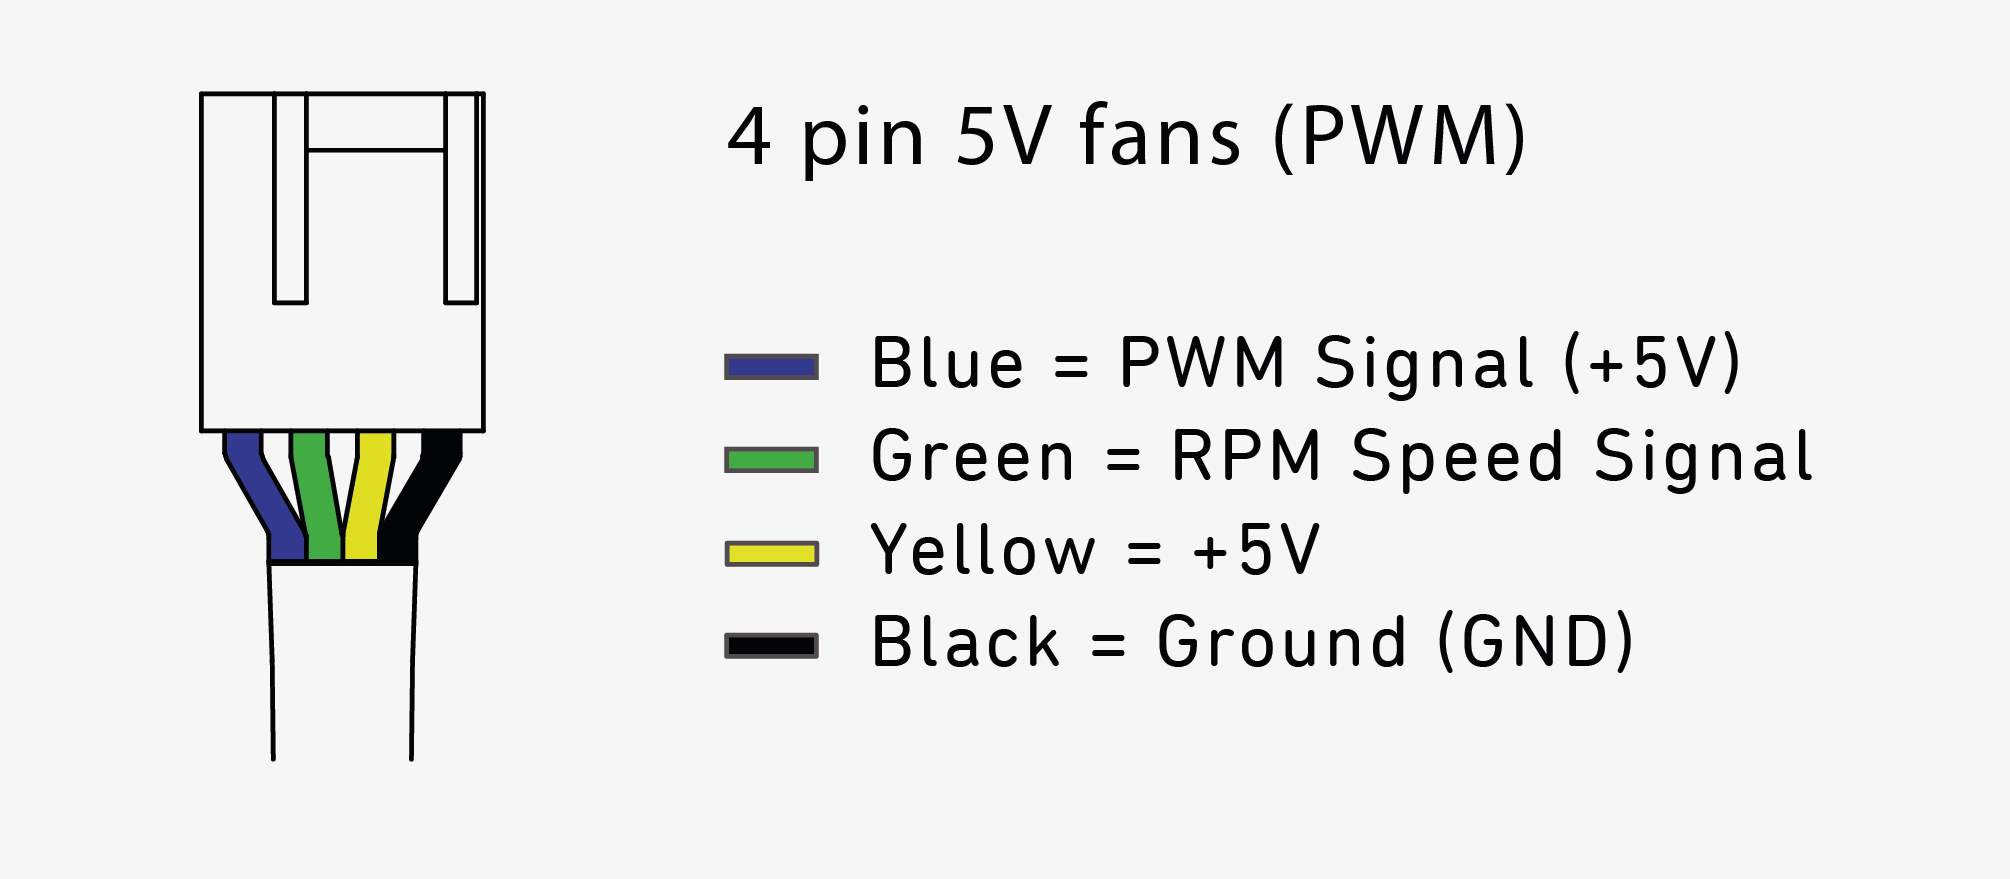
it is the green one, you don’t need.
but before you finally cut the cable, test it 
1 Like
What is the best way to persist this after reboot?
I confirm this. I have
sensors
mt7915_phy1-isa-18000000
Adapter: ISA adapter
temp1:        +63.0°C  (high = +120.0°C, crit = +110.0°C)

mt7915_phy0-isa-18000000
Adapter: ISA adapter
temp1:        +41.0°C  (high = +120.0°C, crit = +110.0°C)
With my thermometer gun, I read 40C max.
We triggered 2 times but get no response…what should we do?
just add “echo 1 > /sys/class/thermal/cooling_device0/cur_state” to the file /etc/rc.local before the “exit 0” statement
1 Like
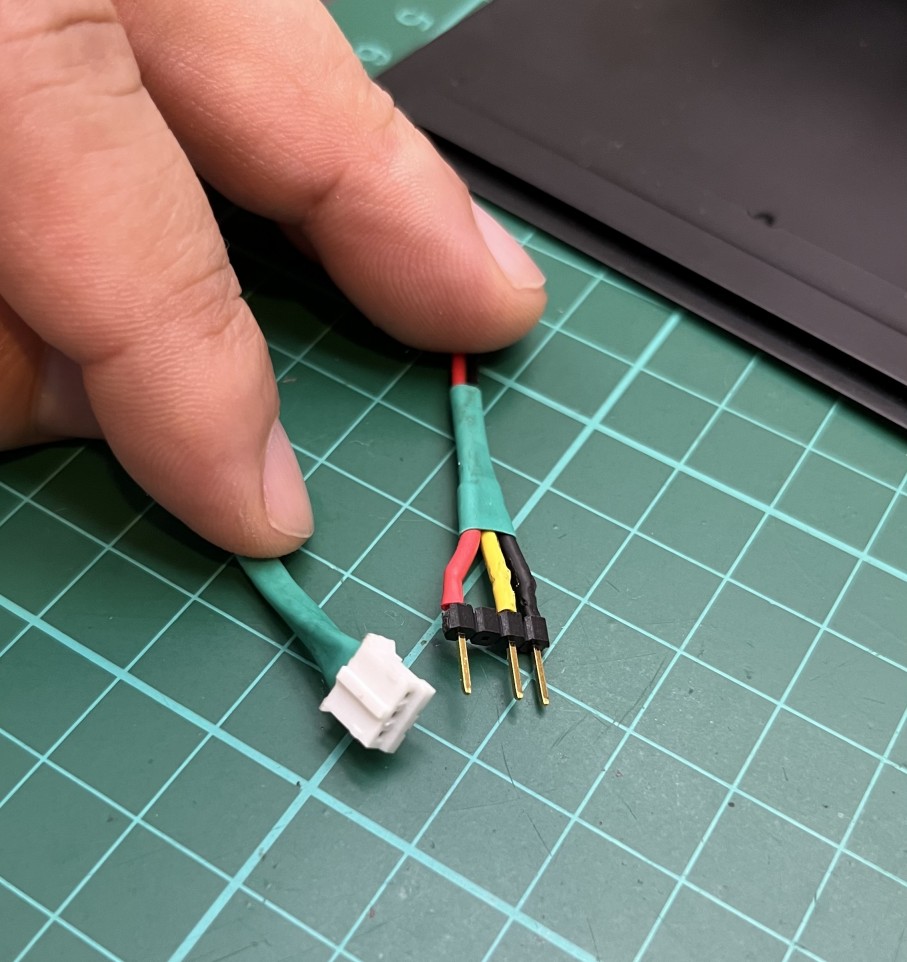
Thank you all for share your insights on how to make use of PWM fan header, with your guide I was able to install an exhaust fan.
Parts used:
- Noctua NF-A4x10 5V (4 pin)
- Micro JST PH connector (3 pin)
- Terminal pin header
- Plastic mesh
- Ordinary PC fan screw

1 Like
Hi Dale,
could you please give me a detailed description of how to apply your solution? How can you get 12V from SATA power? Which one is gnd, +, etc…
I’ve ordered a 4pin and 2pin fan also…
You can find a detailed description, including my scripts on androidpimp
1 Like