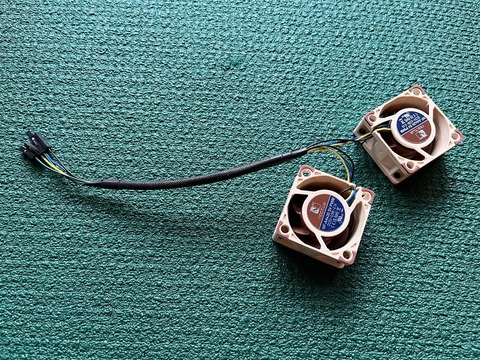
The extra pin of each fan is a tachometer output. You can leave those disconnected or connect them to the unused GPIO pins for RPM monitoring (check out this tool). For my build I just cut off the fan connectors, soldered on extension wires and crimped female Dupont connectors onto the ends. I also reused the sleeve that came from the factory and secured it with heat-shrink to make the harness look tidier.
I appreciate your answer. I was able to make it work perfectly.
I have a few more questions:
Use this script for OpenWrt which reads all temperature sensors in hwmon and adjusts the fan speed according to the highest reading; you can dial in your own temp thresholds there
Put the script into /opt (or any persistent directory) with the following command (if using Linux or macOS): scp -O /…/fan_pwm.sh [email protected]:/opt/
Make it executable: chmod +x fan_pwm.sh
Make it run at startup: sed -i ‘/^exit/i /opt/fan_pwm.sh &\n’ /etc/rc.local
For a common mortal that is approaching this from a 0-knowledge perspective, how do I do this exactly? I was capable of making the script run from ssh, but I don’t know how to save that and make it run on startup.
Rather than making the grounding strips by hand, order them to be laser-cut instead—it’s likely to cost less than your time spent measuring, drilling and cutting
Are there any CONS in not using the grounding strip? I installed everything without it, and it’s working decent.
Oh, BTW, just for laughing a bit, instead of soldering the EMI shielding, I used superglue
Regardless, before I was somewhere at 78/79 noise, now I sit at around 85. It’s still progress!
For a common mortal that is approaching this from a 0-knowledge perspective, how do I do this exactly? I was capable of making the script run from ssh, but I don’t know how to save that and make it run on startup.
If you’re creating the script on the system rather than transferring over:
Install a text editor with apk add nano or ipkg install nano depending on your OpenWrt release, if not already installed
Run nano /opt/fan_pwm.sh
Copy/paste the script code into the editor; make changes to the temperature threshold values if desired
Press Ctrl+X, then Y to save
Run chmod +x /opt/fan_pwm.sh to make the script executable
Run sed -i ‘/^exit/i /opt/fan_pwm.sh &\n’ /etc/rc.local to make it run on startup
Verify by running cat /etc/rc.local; you should see the line /opt/fan_pwm.sh &
Run /opt/fan_pwm.sh & to launch the script without rebooting; you should hear the fans slow down
For further tweaking of the temperature thresholds, go back to steps 2 and 4
Install the luci-app-statistics and lm-sensors packages to track the temperature
Are there any CONS in not using the grounding strip? I installed everything without it, and it’s working decent.
In my experience, the improvement from the grounding strips and EMI shielding together was marginal, but that could change depending on how congested your Wi-Fi environment is. I also hope the BE19 will be inherently less susceptible to noise to benefit from extra grounding.
Added back plates for the 2.5GbE version. Can’t test for fit, as I don’t have a 2.5GbE version to verify dimensions. Adjust the STEP file if necessary. There’s also not enough room to use the PoE module and TTL to USB adapter in the same device and I gave up on finding alternative placement for the adapter.
Corrected an error which made one of the baked-in support fins on the back plate disconnect from the model after slicing.
Looking at my previous experiments, when everything else has been sorted out (SFP cages populated, pigtails routed properly), not using the stock metal case can lower the noise by about ~9 dBm.
I have a copper heatsink mounted on top of custom-made EMI shielding. Thermal pads under the shield can, thermal adhesive tape between the heatsink and the shield can.
Slapping three smaller heatsinks on the ICs with thermal tape will do just as well. One large heatsink won’t work, though, as the ICs differ in height.
@Betonmischer Man, you’re out-of-mind! (in a very very good way!)
If I can find all the pieces, I’ll give it a try with ABS (any clue for support material?).
Fans should be pushing or pulling air?
Out of my curiosity, what CAD did you use to design this beauty?
A guy on MakerWorld had success with ABS, but he didn’t post any photos and I’d be worried about ABS warping with such large flat parts. If you’re willing to give it a try, though, I’d pick the ABS-compatible support material from the same manufacturer as the ABS. A way better option dimentional stability-wise would be GF or CF-reinforced ABS/ASA, but those might require a larger than 0.4mm nozzle. BTW, at first I was apprehensive of PLA due to the low glass transition temperature of 55–65 °C, but the R4 should never get the air inside the case anywhere close to that.
As for the fans, they fit both ways, but I’d install them for intake so that the cold air hits the Wi-Fi board and the SFP cages first.
I used Fusion 360. Or rather, used this project to learn Fusion, which lead to a file with a pretty messy history, otherwise I’d share it and made the project fully open-source.
Yes. It would help if Sinovoip published DXF drawings of the board, which they haven’t yet. So I’m waiting until the Pro is available to buy, which I’d have to do regardless to verify the dimensions.
The print will have to be tested to fit the real thing, so I’d suggest not rushing it. I’m personally holding off until the first reviews are out and no critical bugs are found in the board.
Could you please modify this case to allow for the installation of an 80mm fan, for example, from the top with an air intake from the bottom. Also, remove the side grilles. This will slightly increase temperatures but allow for the installation of a wider range of fans at affordable prices.