BPI-R2 Pro
Burning Video
What follows is the video of how to bootup from SD card and eMMC.

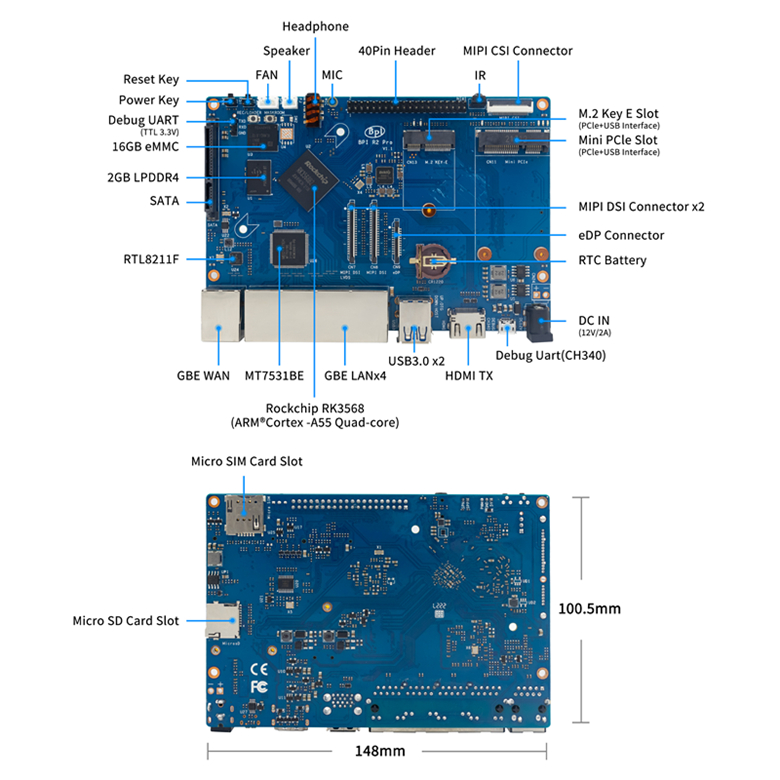
Hardware spec
| Components | Parameters |
|---|---|
| CPU | Rockchip RK3568 Quad-core ARM Cortex-A55 CPU 2GHz |
| GPU | Mali-G52 1-Core-2EE OpenGL ES3.2 Vu1kn 1.1 OpenCL 2.0 |
| Memory | 2G DDR3 SDRAM (option 4G) |
| Storage | Onboard 16GB eMMC Flash, Micro SD-Card slot, SATA 3.0 Port,SPI flash |
| Network | 5 x 10/100/1000 Mbit/s Ethernet |
| Display | 1 HDMI port, 2 DSI interface(1 DSI can change to LVDS by software) |
| Camera | 1 CSI camera interfact |
| Audio output | HDMI & I2S & Speaker & Headphone |
| USB port | USB 3.0 PORT (x2), micro USB OTG (x1) |
| Mini PCIE | 1 mini pcie interface & 1 M.2 key-e interface |
| Remote | IR Receiver (x1) |
| Power source | 12 volt @2A via DC Power and/or Micro USB (OTG) |
| OS | OpenWRT, Linux and others OS |
Hardware interface
Getting started guide
Android/Linux
Load the image on eMMC
Preparation
- Double male USB data cable for image download or abd debug.
- MicroUSB cable or usb to ttl cable if you need console debug message print, default baudrate is 1500000.
- Windows PC.
- Download the latest OS image, and confirm that the md5 checknum is correct before flashing.
Install image with USB Download tool
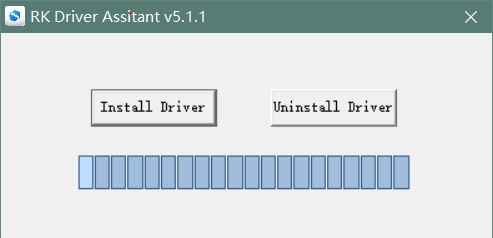
- Download and install the Rockchip USB driver.
- Download Rockchip USB Download Tool.
This tool defaults language is Chinese. You can change it to English after extract the package. Open RKDevTool_Release_v2.84/config.ini with an text editor (like notepad). The starting lines are:
 #Language Selection: Selected=1(Chinese); Selected=2(English)
 [Language]
 Kinds=2
 Selected=1
 LangPath=Language\
-
Open RKDevTool.exe, Switch to the “upgrade firmware” page. Press the “firmware” button to open the image file to be upgraded. The upgrade tool displays detailed firmware information.
-
Disconnect power adapter, connect dual male usb cable from the top usb host port to PC.
-
There have two usb download mode for image upgrade.
- Uboot USB Download Mode (loader mode)
It’s supposed to use this way if board already flashed a bootable uboot before.
- Maskrom USB Download Mode (maskrom mode)
Press the Recovery button or Maskrom button beside 3pin uart header and hold, connect the power adapter or press the RST button if power adapter already connected, about two seconds later, release the button. PC will Identify the device if RK usb driver installed correctly.
The download tool also show the download mode if device connected.
- Press the “upgrade” button to start the upgrade.
- If the upgrade fails, yu can try to erase the eMMC by clicking on te “EraseFlash” button, and upgrade image again.
Boot from eMMC
Power on and establish a new serial session on MobaXter.
- The port is COM5 CH340.
- The speed we choose 1500000.
Install the image to a SD card
-
Download the Rockchip SDDiskTool.
-
Connect SD card reader to Windows PC. The size of micro SD card should be at least 8GB.
-
Run SD_Firmaware_Tool, check the “Upgrade Firmware” box and select the correct removable disk device. Choose firmware image, then click on “Create” button to make it and wait until it is finshed.
-
Safely remove the microSD card, insert it into the R2Pro board, power on the board, it will start upgrading automatically.
-
After upgrading, it will prompt you to remove the SD card.
-
Remove the card and wait for bootup.