BPI-R2 based DIY NAS/Router

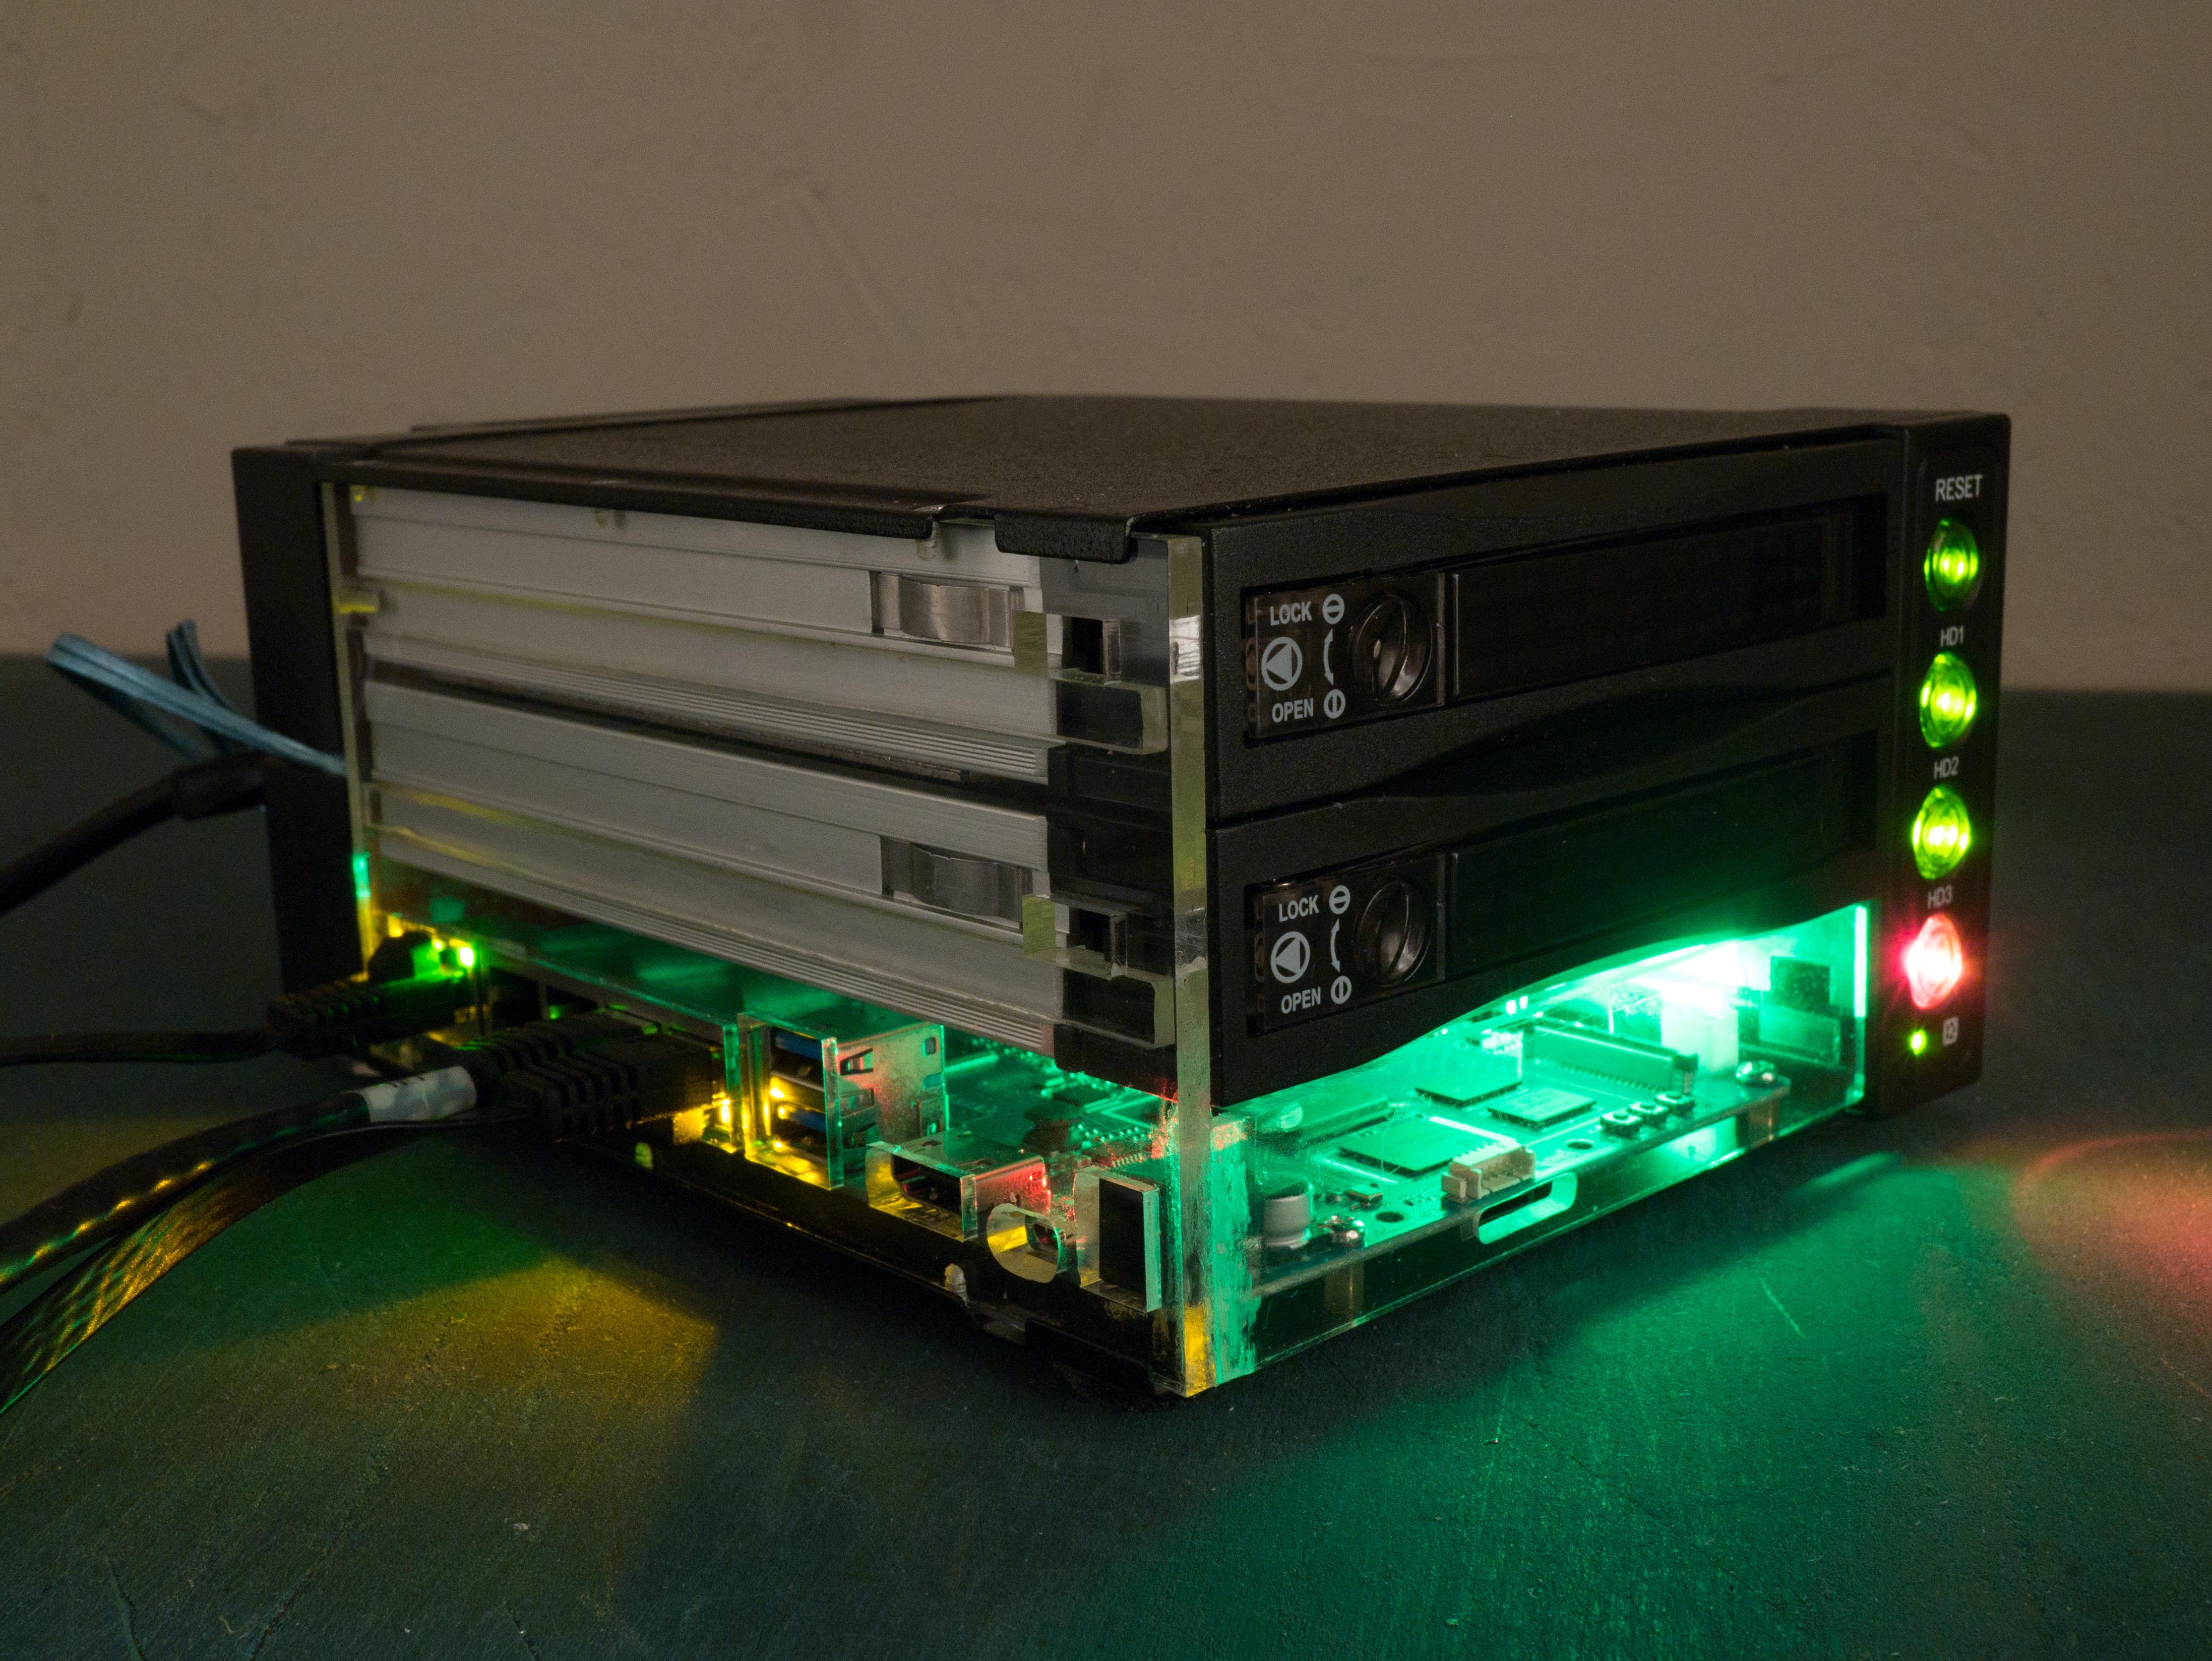
I thought I’d share my finished project using the BPI-R2 here. I built a tiny NAS/router inside a hot-swap hard drive cage. The dimensions of the BPI-R2 were excellent for this size, it’s basically the size of a 3.5" hard drive and all the I/O ports are on the same edge. Luckily I could position the SD card at the front and it is still accessible.

SATA and network speeds are perfectly fine for a non-SSD NAS. The 300MB/s limit would be a problem for connecting two SSDs though. The CPU is fast enough as a NAS but is a little slow if I want to run other things on it too. I’ll consider an aarch64 board next time, otherwise I may switch to x86_64 boards if I need speed. More RAM and a 64-bit OS are preferred for ZFS, but it I actually got it running on the BPI-R2 anyway (I did have to manually give the kernel more RAM with vmalloc=496M during boot).

It wasn’t possible to connect an internal power supply so I had to solder the power lines to the pins of the barrel plug. That worked fine, but was kind of weird.

The full build details are on my website:

4 Likes

Hi Bburky

It’s wonderfull I was trying the same thing from my side, but I was more interested about the software layer. What Kernel version are you running ? How do you build ZFS ? (native, fuse etc…) I’m yet using ZFS from my side, compil it was not easy. It’s running slowly but it works: using snapshot dedup and FS compression.

What was your issue about virtual memory ?

Very good jobs again !

Native ZFS. I built zfsonlinux from source following these instructions for kmods. Compression is probably okay as long as you’re not using gzip, it can be very slow. Deduplication is likely a bad idea with only 2GB RAM, it needs lots more.

I manually tuned vmalloc by trial and error. That was needed because the kernel doesn’t always have much RAM allocated for itself on 32-bit devices. I was seeing slow 10MB/s write speeds that went up to 60MB/s after tweaking it.

Also, I have gotten read speeds up to 108MB/s over SMB on large files (ZFS can read from both drives of a mirror at once).

You probably cut that acrylic on a laser cutter? Would you mind sharing the details (measures, draws)? I want to build a 3d printed case for my Bpi-R2.

Thanks

Have you seen the 3d case from felix and my svgs for laser cutter?

The diagrams are in the article on my website including the PDF outlines used for laser cutting. The outlines weren’t quite perfect, I did have to remove the thin piece of plastic between the WAN and LAN ports.

I did the front panel by hand though. Just cut out the SD card slot with a router.

I found it really easy to get outlines of the ports by just tracing an image of them from a flatbed scanner.

I hadn’t.

I have know. Thanks!

I didn’t saw the article at first. Cool article btw.

Thanks for it

That thing looks like sth I was planning for my bpi w2. Great read.

Banana Pi BPI-W2 source code public on github :slight_smile:

Hi there, I do have BananaPi R2. I managed to build ZFS into the kernel, update regdom data and removed limits from ath9k driver (not power limits, just enabled AP mode for AR958x). Now, I mirrored whole rootfs to ZFS pool. I created all datasets, everything is fine. The problem is that the system doesn’t boot with ZFS as rootfs. The kernel panics, as it says that it doesn’t know what root=ZFS="rpool/ROOT/ubuntu_h1wz1w" is. As you say you managed it to use ZFS as rootfs, could you maybe elaborate? Maybe uboot doesn’t accept quotes in variables?

And yes, ZFS kernel module is built-in.

Update: All issues resolved. I do use ZFS as bootfs, I do run ath9k wireless card in AP mode, and internal wireless also works in AP mode.

Maybe you could write how you fixed it?

So how to build kernel with zfs support,create the zfs volume and mounting (still initrd needed?),cmdline,…

Hi, I believe I already did in other threads. But to make it simple:

To fix ZFS ROOTFS boot, you have to prepare initrd. Reading Canonical’s wiki, it was quite easy to do. I already posted about it.

But before you’ll do anything else - just prepare the initramfs image, and extract it. do:

cd /usr/src/initramfs_extracted
mkdir dev; cd dev
mknod -m 622 console c 5 1
mknod -m 622 tty0 c 4 0

Depending on your base OS (in my case, Ubuntu 24.04.1), copy bellow files from x86_64 system over to your extracted initramfs dir, using same paths:

/etc/init.d/zfs-import
/etc/init.d/zfs-load-key
/etc/init.d/zfs-mount
/etc/init.d/zfs-share
/etc/init.d/zfs-zed

Only then run cpio to create new initramfs.file Then, you need to rebuild the kernel with ZFS (CONFIG_ZFS=y), and tell the kernel where to look for your initramfs image: CONFIG_INITRAMFS_SOURCE="../initramfs.cpio" (modify the path to suit your location)

Resulting uImage will be around 49MB.

If you’ll try to boot it now, nothing will happen - it will simply boot, the boot itself will be longer by ~15s.

But then you can create your zpools. Generic Ubuntu Howto could be used on how to prepare rpool zpool (we won’t need bpool since the host boots off of EMMC’s first partition to retain compatibility).

Prepare your rootfs ZFS (chroot, debootstrap…be my guest - just note: you do not need bootfs). Once done, boot your system by calling bellow in uBoot terminal:

setenv partition 0:1
setenv bootenv uEnv.txt
run loadbootenv
setenv bootargs board=bpi-r2 earlyprintk console=tty1 fbcon=map:0 console=ttyS0,115200 vmalloc=768M debug=7 initcall_debug=0 root=zfs="rpool/ROOT/ubuntu_h1wz1w" init_on_alloc=0
fatload mmc 0:1 ${loadaddr} ${bpi}/${board}/${service}/${kernel}; bootm

Don’t forget to change host UUID, in my case it is ‘h1wz1w’. It should boot. Now, to make sure you can boot always with ZFS, you’d need to change uEnv.txt:

#
## uEnv.txt
#
bpi=bananapi
board=bpi-r2
chip=mt7623n
service=linux
#
kernel=uImage-5.15.173-bpi-r2-main
#
kaddr=0x84000000
rdaddr=0x86000000
#
initsata=pci enum;scsi scan
console=earlyprintk console=tty1 fbcon=map:0 console=ttyS0,115200
bootopts=vmalloc=768M debug=7 initcall_debug=0 ipv6.disable=1 video=HDMI-A-1:1280x1024D fsck.mode=force fsck.repair=yes init_on_alloc=0
abootargs=setenv bootargs board=${board} console=${console} root=ZFS=rpool/ROOT/ubuntu_h1wz1w service=${service} ${bootopts}
ahello=echo Banana Pi ${board} chip: $chip Service: $service
aboot=if fatload $device $partition $rdaddr ${bpi}/berryboot.img; then bootm $kaddr $rdaddr ; else bootm $kaddr; fi
aload_kernel=fatload $device $partition $kaddr ${bpi}/${board}/${service}/${kernel}
uenvcmd=run ahello abootargs aload_kernel aboot
## END

Oh, and I did it all natively on the box itself. While I can cross-compile the kernel and it boots the same as the one I built on the machine, everything else is easier on the board, rather than on the PC. Initramfs for x86_64 wouldn’t work on your arm.

Should you want more nuanced boot menu, you can also use this uEnv-r2.txt, put it to uBoot source directory, and rebuild: image
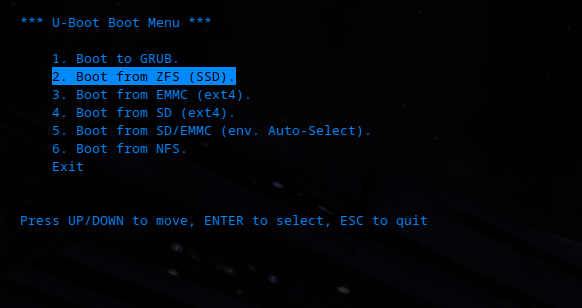
Just don’t forget to update it with the details of your zpool UUIDs before rebuilding. Also, I do use longer filenames for uImage kernel files. New uBoot can be flashed by:

dd if=./u-boot.bin of=/dev/mmcblk1 bs=1k seek=320

from uBoot source dir.

For those who would like to try, I do have patch for uBoot to enable ZFS bootfs zpool as well. But I haven’t tried it myself, although I verified that uBoot can read binary files and execute them from ZFS dataset, so it should work. But I’d like to keep EMMC as a blank copy of my live system, and should disaster happen, I will boot to EMMC only, in order to fix ZFS issues, should something like that ever happen.
1 Like