BPI-F4:How to create an image that can use OV5647
1.Install dependency packages and tools
sudo apt-get install pv openssl libssl-dev bison flex git make u-boot-tools libmpc-dev libgmp-dev python3-pip mtd-utils libncurses5 libncurses-dev mtools -y
sudo pip install pycryptodomex pyelftools Crypto
sudo ln -s /usr/bin/python3 /usr/bin/python
2.Code download
Gitee:
git clone https://gitee.com/sunplus-plus1/q654.git
or Github:
git clone https://github.com/sunplus-plus1/Q654.git
3.After the download is complete, a directory named q654 will be generated, as shown below:
Execute the following command in this directory to grab the subdirectory code:
git submodule update --init --recursive
Execute the following command to switch to the master branch:
git submodule foreach git checkout master
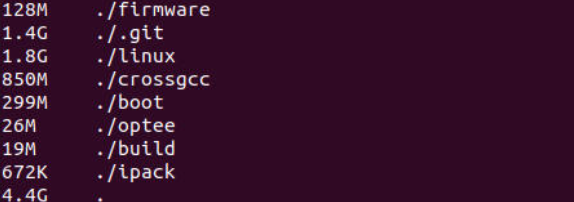
After the download is complete, execute the following command to view the directory file size:
du -hd 1
The directory file size should be:
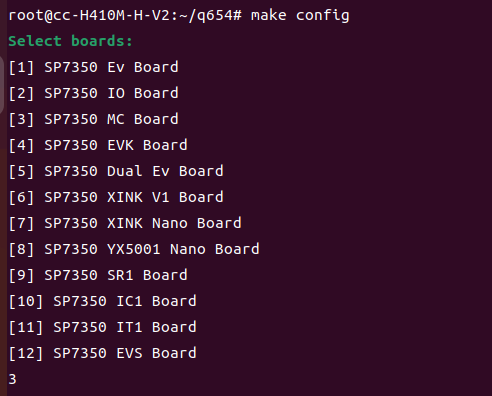
4.Execute make config in the root directory of the code. The first time you run it, it will automatically download all the necessary toolchains from the Internet.
After the download is complete, the hardware platform options will be displayed, including different customer platforms and development board abbreviations.
Select as follows:
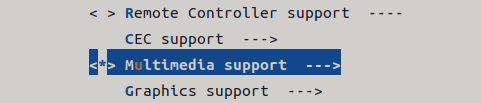
5.Enter the kernel configuration by running the following command in the top directory of project

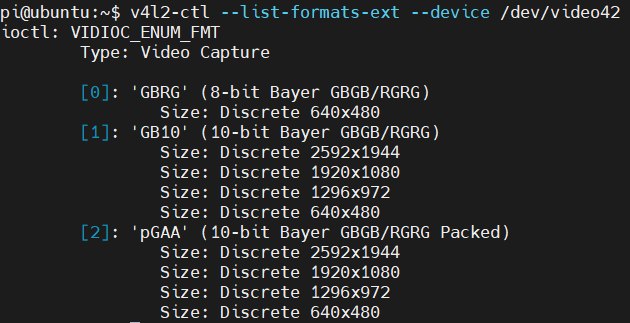
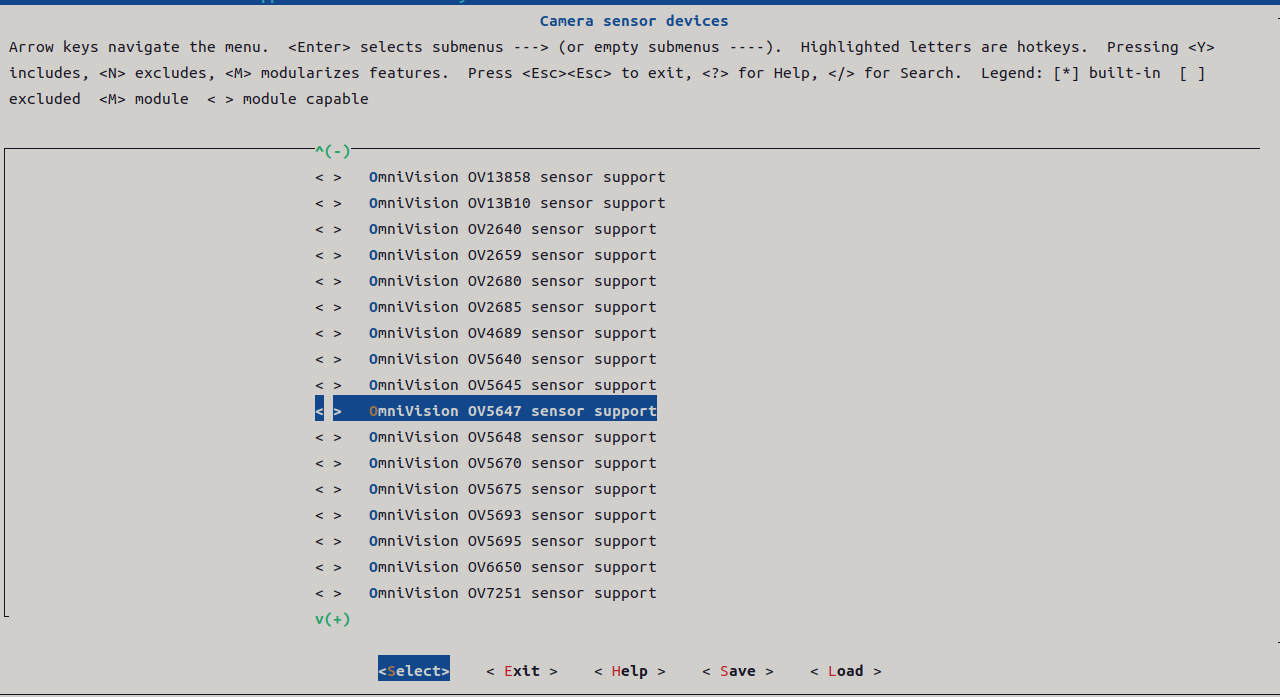
6.Selects sub-menus: Device Drivers>Multimedia support>Media ancillary drivers>Camera sensor devices


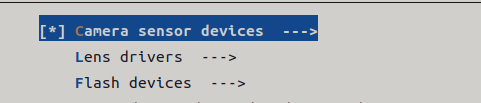
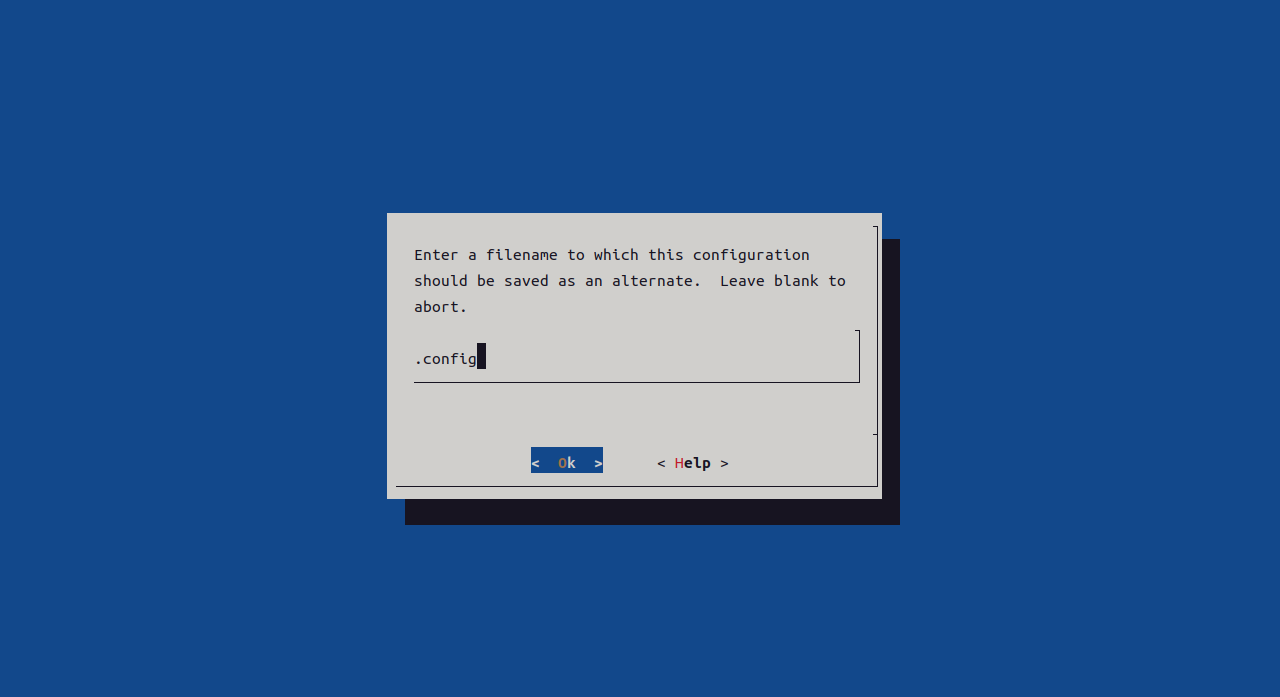
7.Select “OmniVision OV5647 sensor support” and press “Y”. Then save and exit.
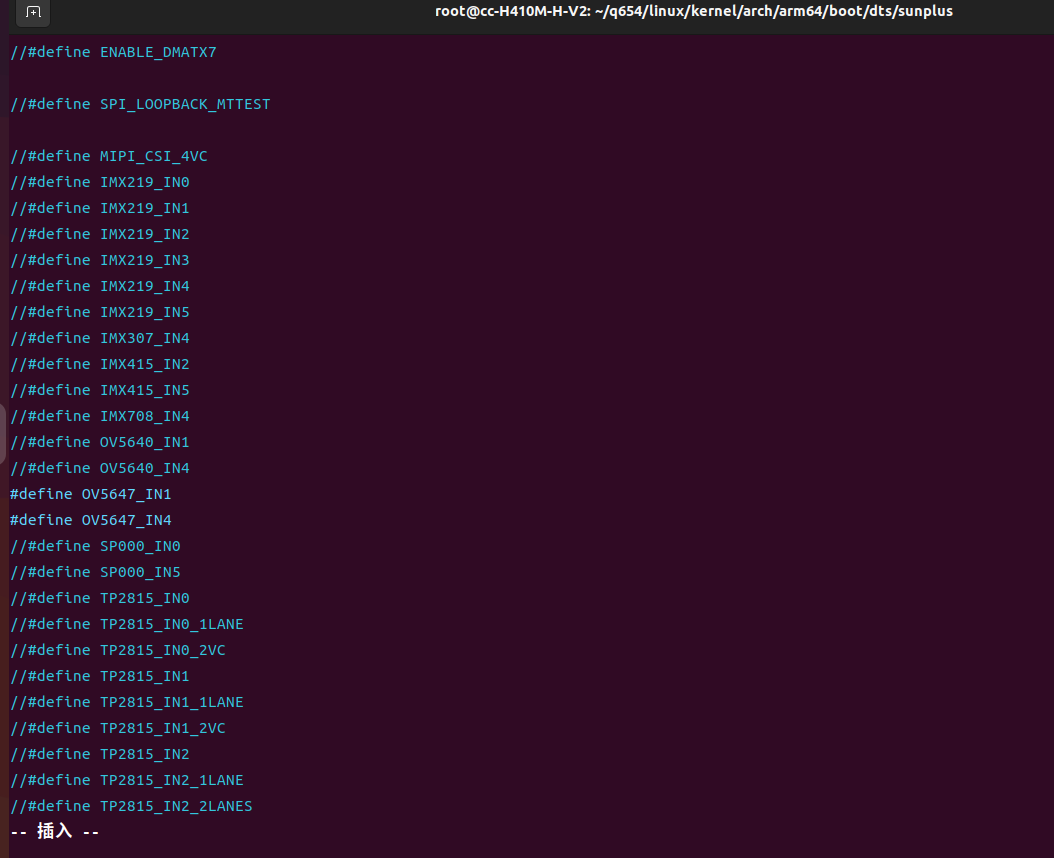
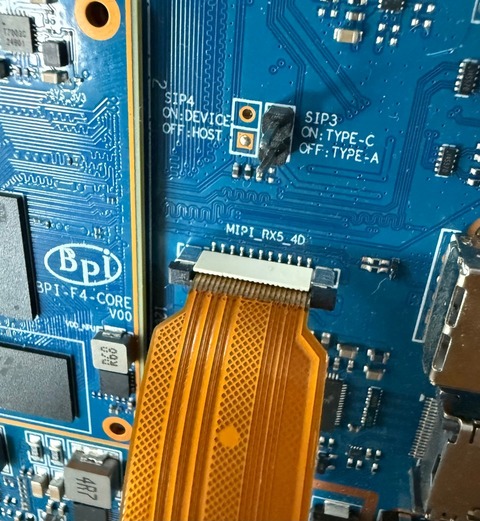
8.Device-tree source files of SP7350 are located in linux/kernel/arch/arm64/boot/dts/sunplus/ .
Modify device tree source file to define OV5647 source for driver
9.After completing all configurations, you are ready to initiate the code build. Execute the following command to commence the build process:

After make command completes, it will display information similar to the following screenshot:
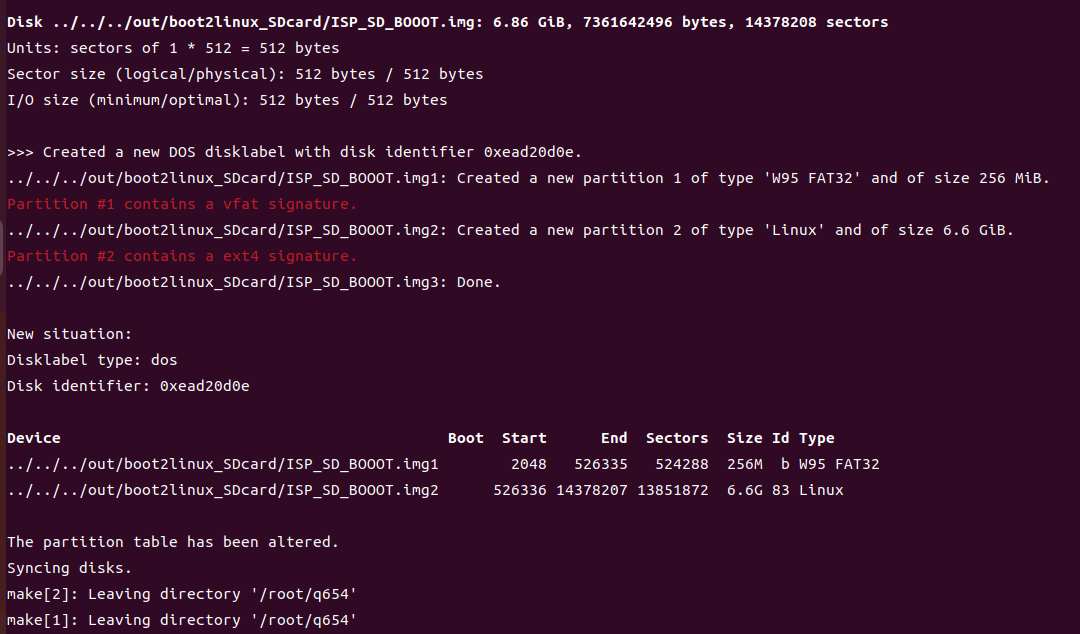
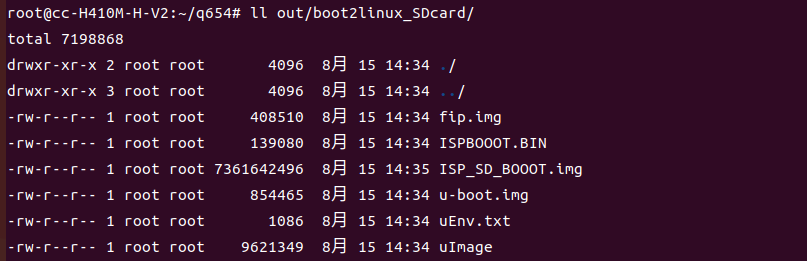
10.Upon completion of the build process, the resulting image files are stored in the directory. Refer to the list below:out/boot2linux_SDcard/
- ISPBOOOT.BIN:** Binary file storing X-Boot, the first-stage boot-loader responsible for DDR SDRAM initialization and training, loading images of TF-A, OP-TEE, U-Boot, and initiating the execution of TF-A.
- fip.img:** Image file comprising images of Trusted Firmware-A (TF-A) and Open Portable Trusted Execution Environment (OP-TEE).
- u-boot.img:** Image file of the U-Boot boot-loader, the second-stage boot-loader responsible for loading and running the Linux kernel image.
- uEnv.txt:** Environment file for U-Boot. U-Boot imports environment variables from this file after initialization. If the uenvcmd command is defined in uEnv.txt, U-Boot executes the specified command after importing uEnv.txt.
- uImage:** Image file of the compressed Linux kernel with the U-Boot header.
- ISP_SD_BOOOT.img:** Image file for burning an SD card, containing all files in both partitions.